MIDI Automation - Elevate Your Synth
Intro
MIDI automation is a vital tool for musicians and producers, enabling the creation of dynamic, expressive performances with ease. By automating parameters like Cutoff, VCA Decay and effects, you can add depth and movement to your music.
Our MIDI devices can send LFOs or any custom curvers, allowing you to extend your gear with more modulation possibilities!
LFO profile
If you're looking to expand your synthesizer's capabilities with additional LFOs and want to assign them to any controllable values, you can achieve this using the EF44 and EN16 modules. Here's how you can enhance your synth with 4 LFOs using our EF44 profile, which is available on our Profile Cloud under the name "4LFO 1.3."
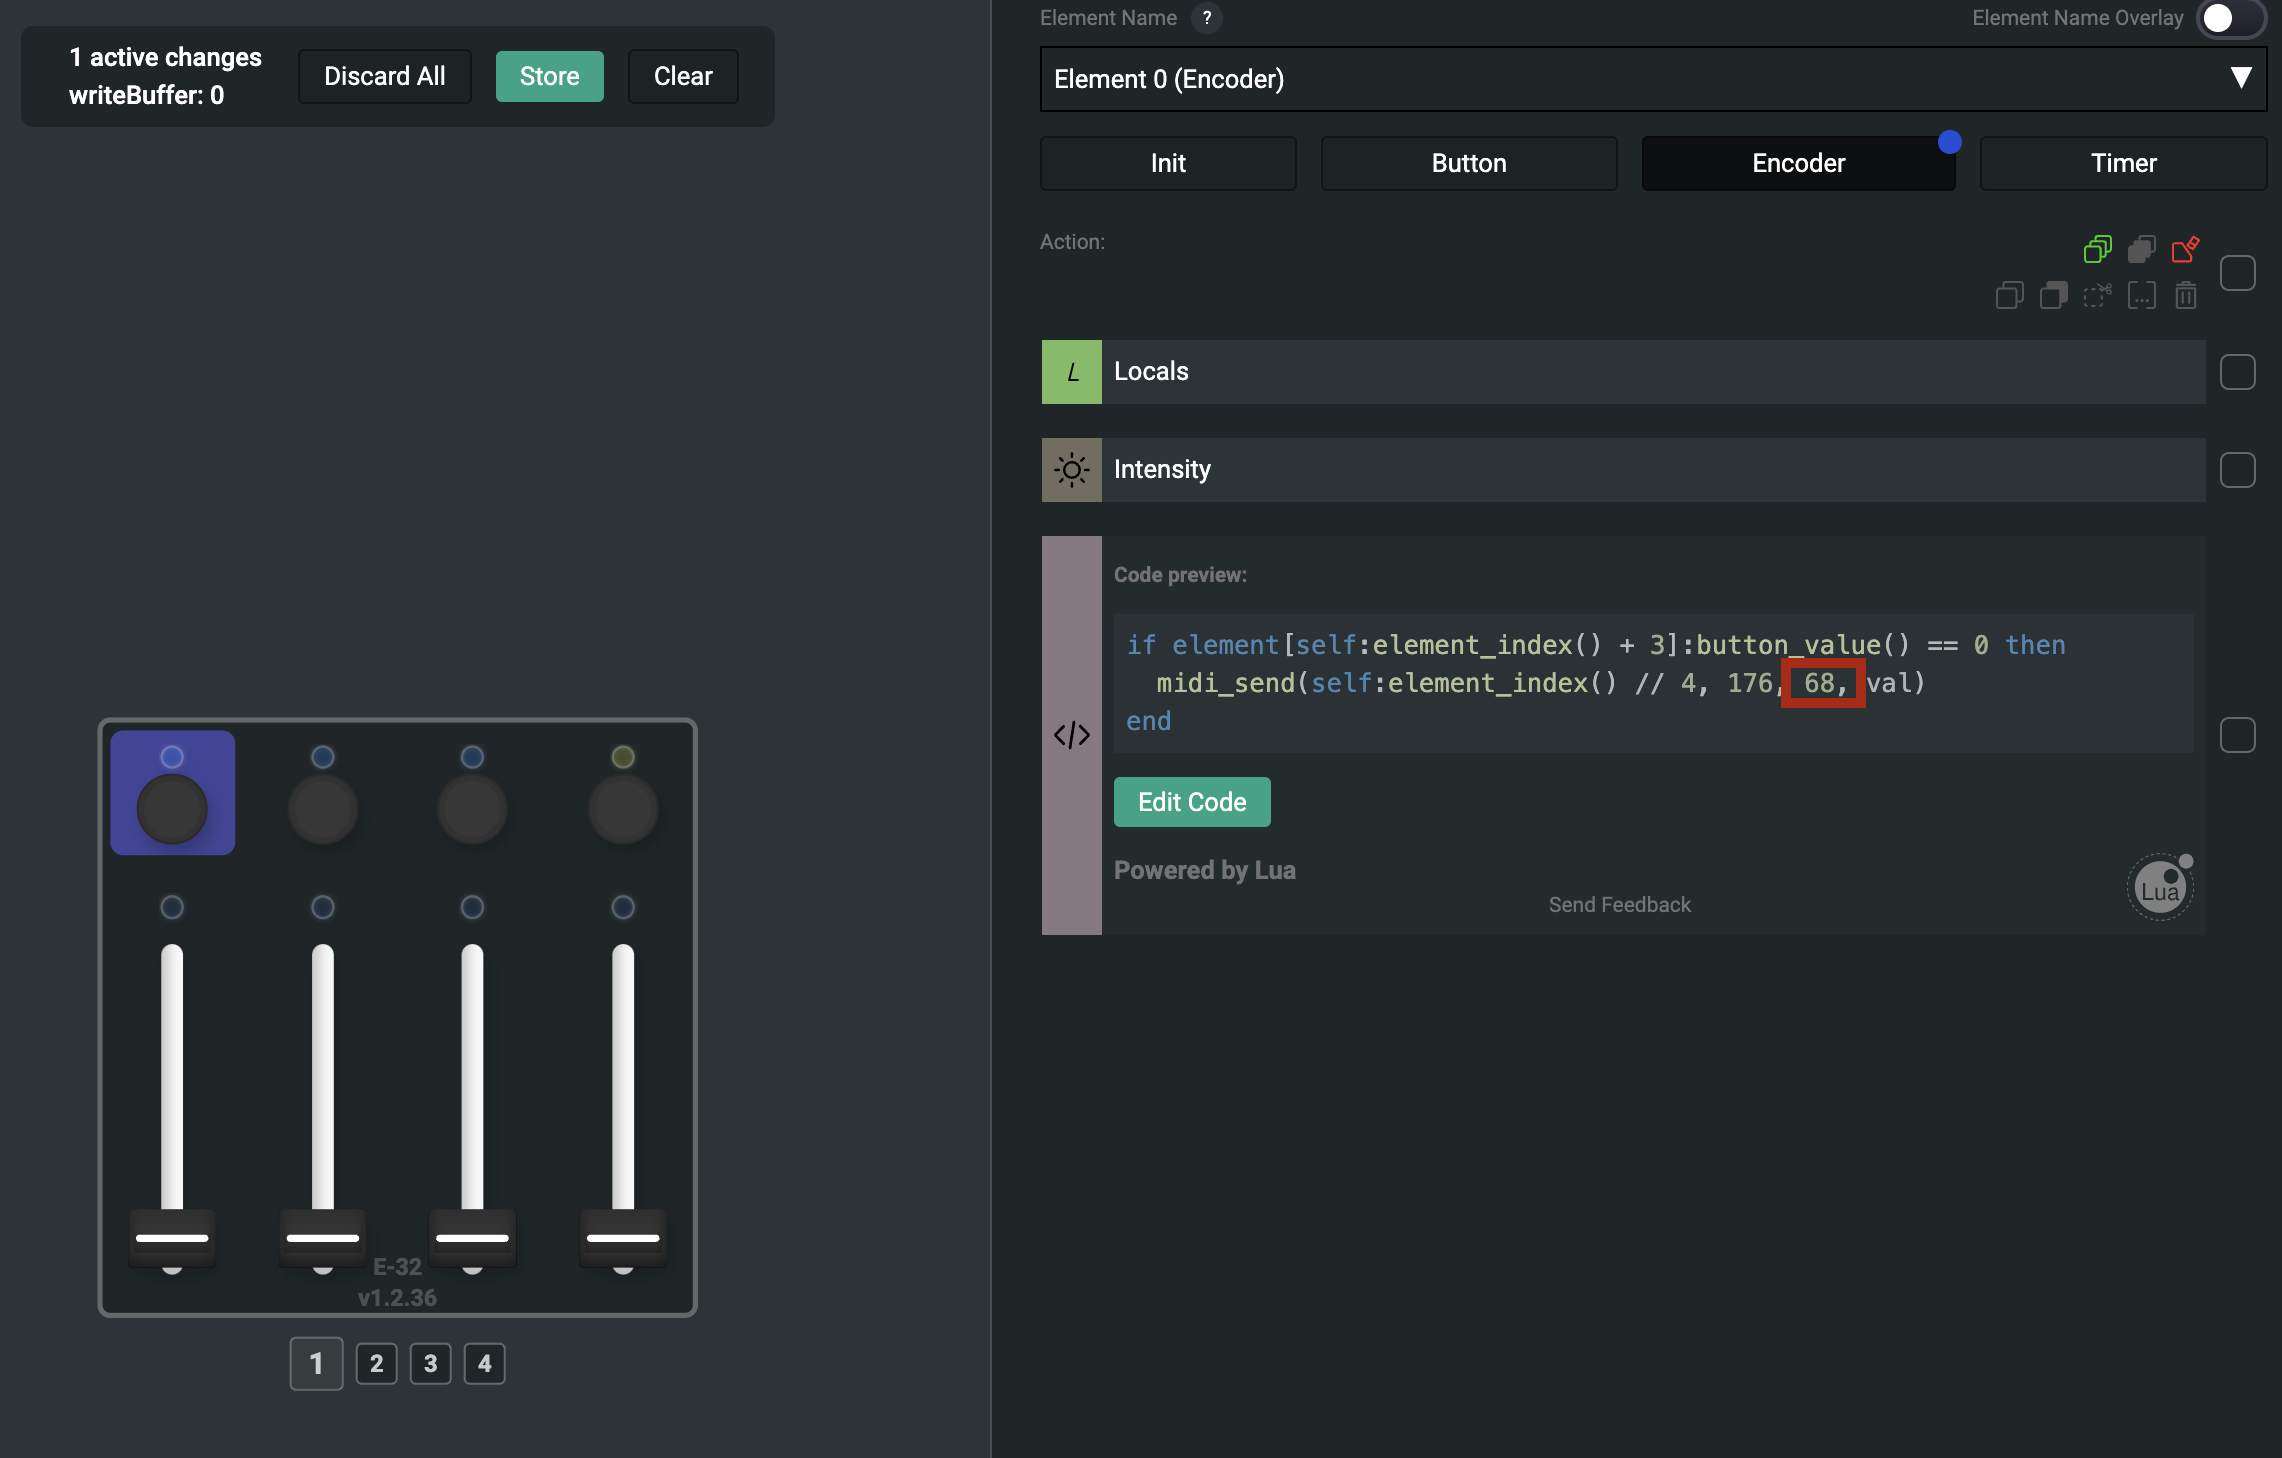
First, refer to your synthesizer's manual to identify a Control Change (CC) parameter that you would like to adjust with the MIDI LFO. A good starting point is the ADSR Decay. For instance, if you are using a Prophet 6, the VCA Envelope Decay corresponds to CC: 68.
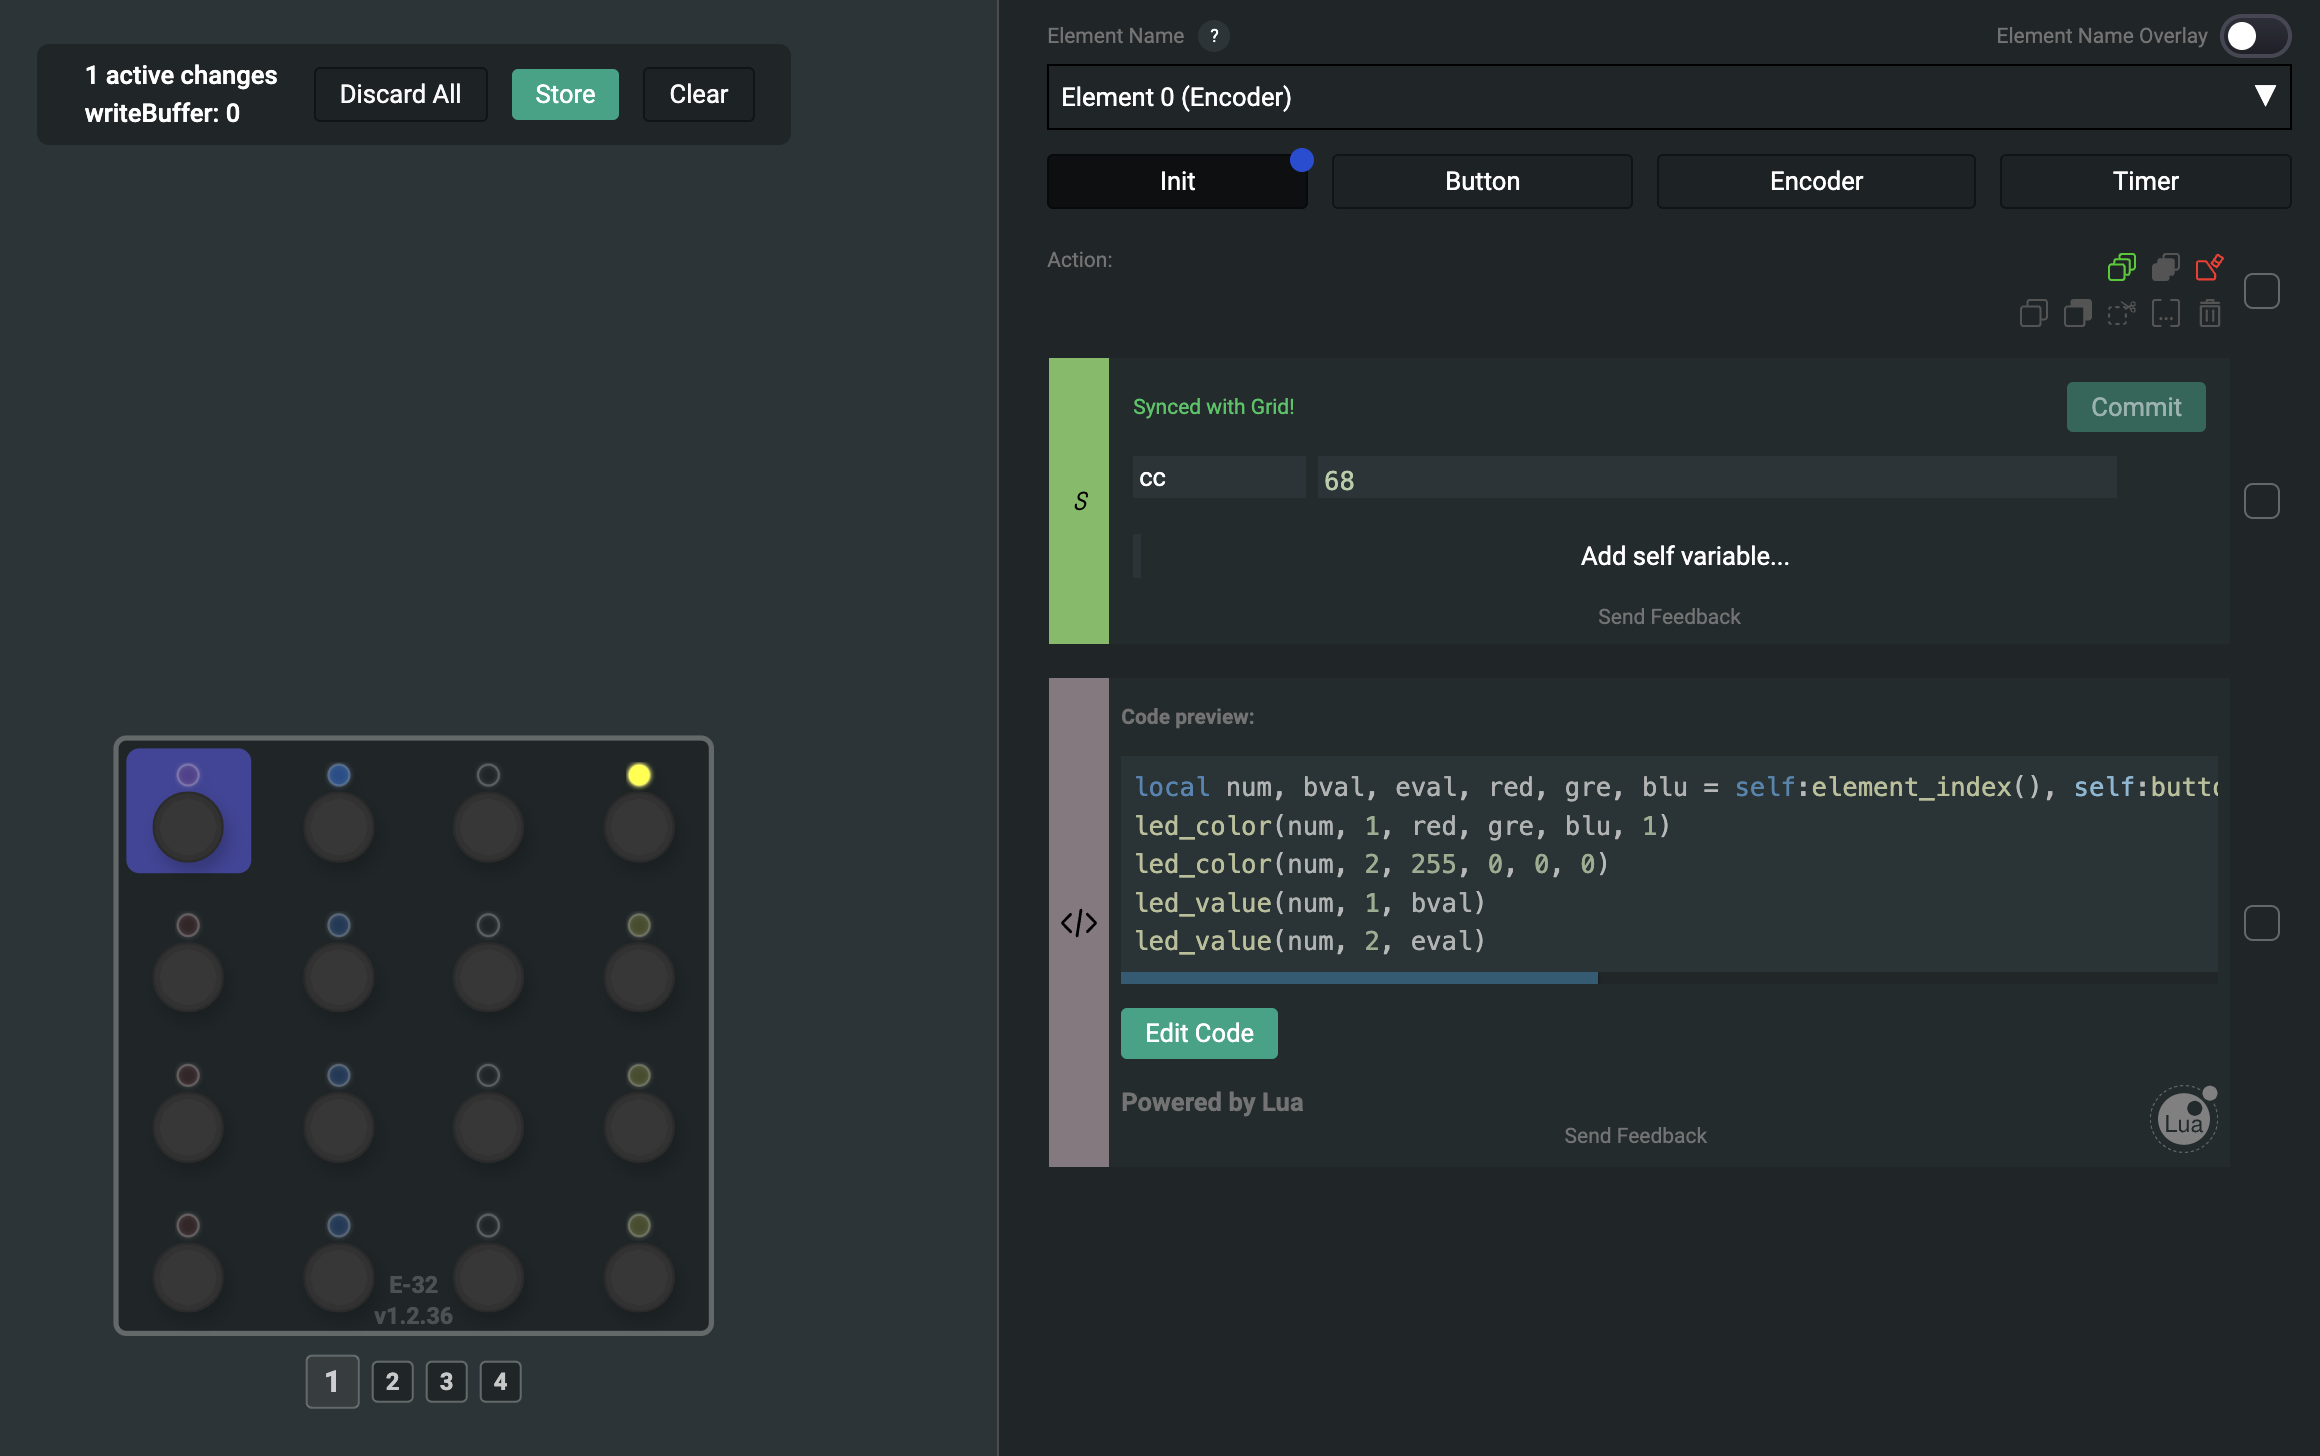
Next, you will need to configure the first encoder to the desired CC value. In this example, you would set the self of the first encoder to 68.

The first knob on your module will control the Offset. This adjusts the baseline level of the parameter you are modulating.
The second knob controls the Range. This determines the amplitude of the LFO, effectively setting how much the parameter will vary.
The last knob adjusts the Speed, which sets the frequency of the LFO, determining how fast the parameter oscillates.
Finally, the push function of the knob will activate or deactivate the LFO modulation, giving you quick control over whether the effect is applied or not.
By following these guidelines, you can effectively add more LFOs to your synthesizer setup and have precise control over various parameters, enhancing your sound design capabilities.
You can use one LFO with the EF44, Profile: 1LFO for EF44.

AHR profile
Attack, hold, and release for the PBF4 is really nice for experimenting, live performance, or synths.
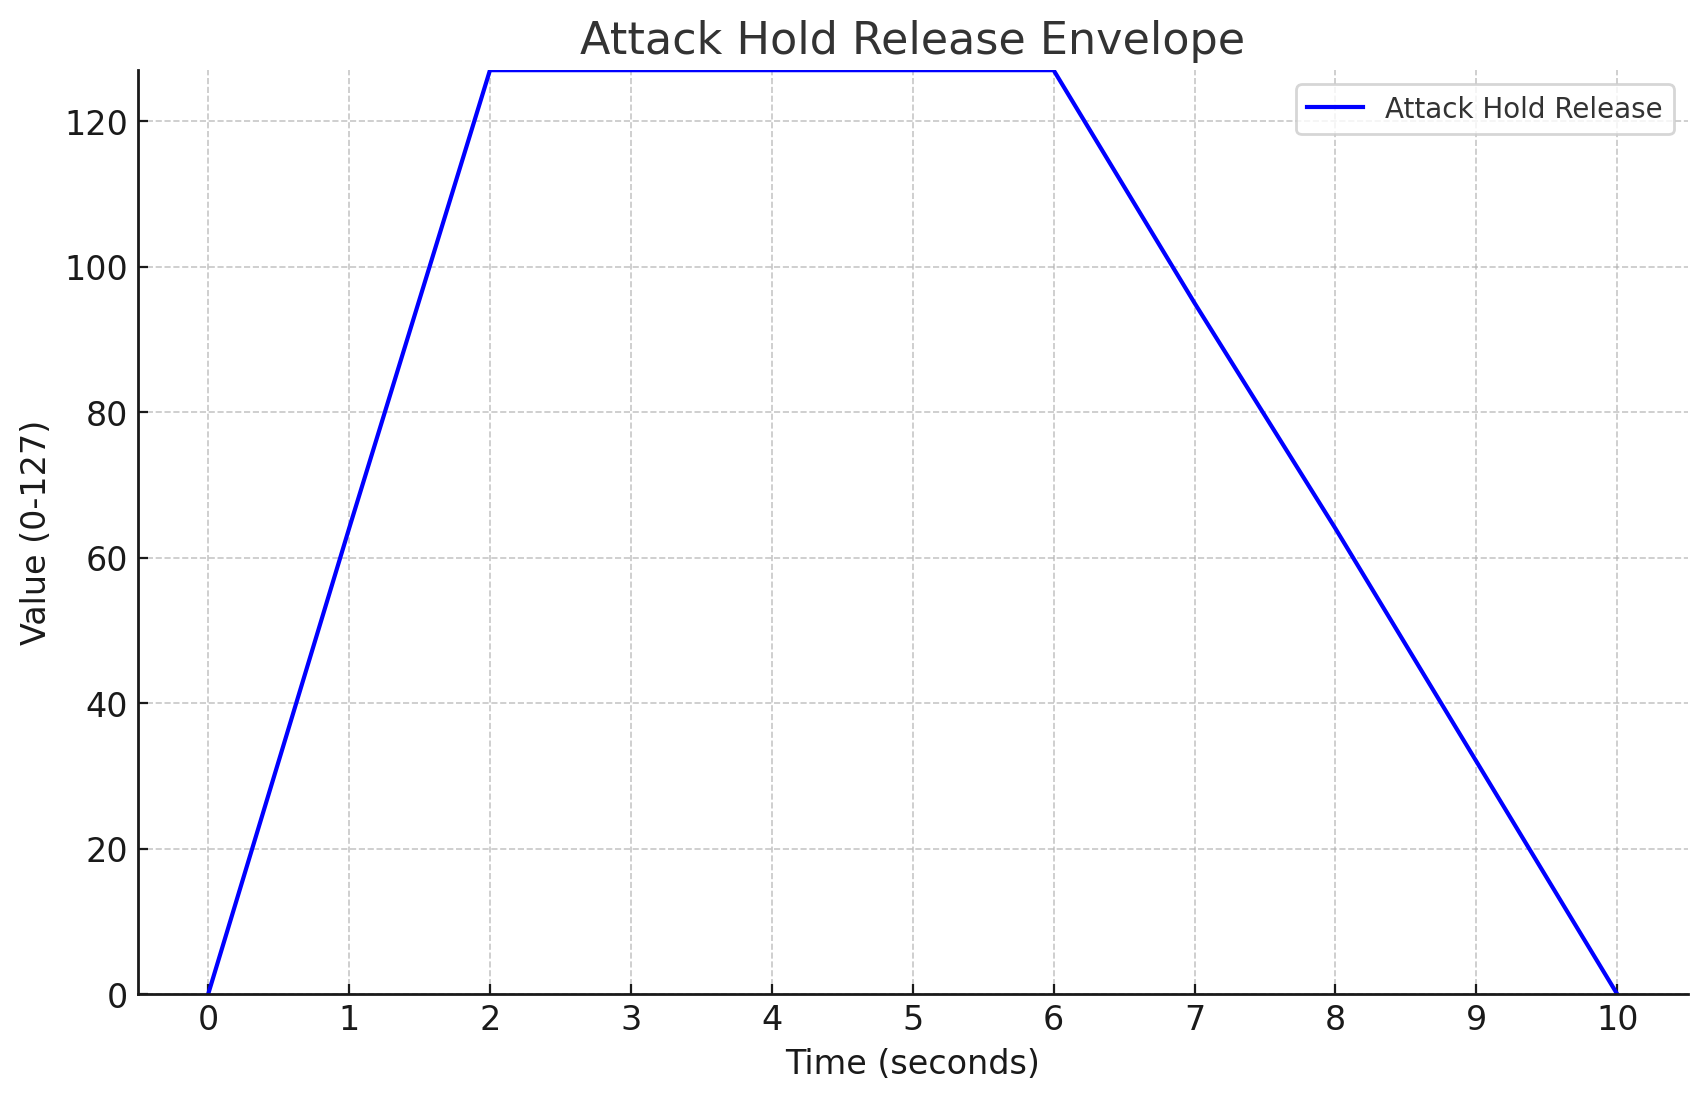
Instead of the button simply moving from the minimum value to the maximum, we control how fast it reaches the maximum value and returns to the minimum. If we press and hold the button, it rises to the maximum value and stays there until we release it. Once the maximum value is reached, it holds, and upon release, it gradually returns to the minimum value over a set time.

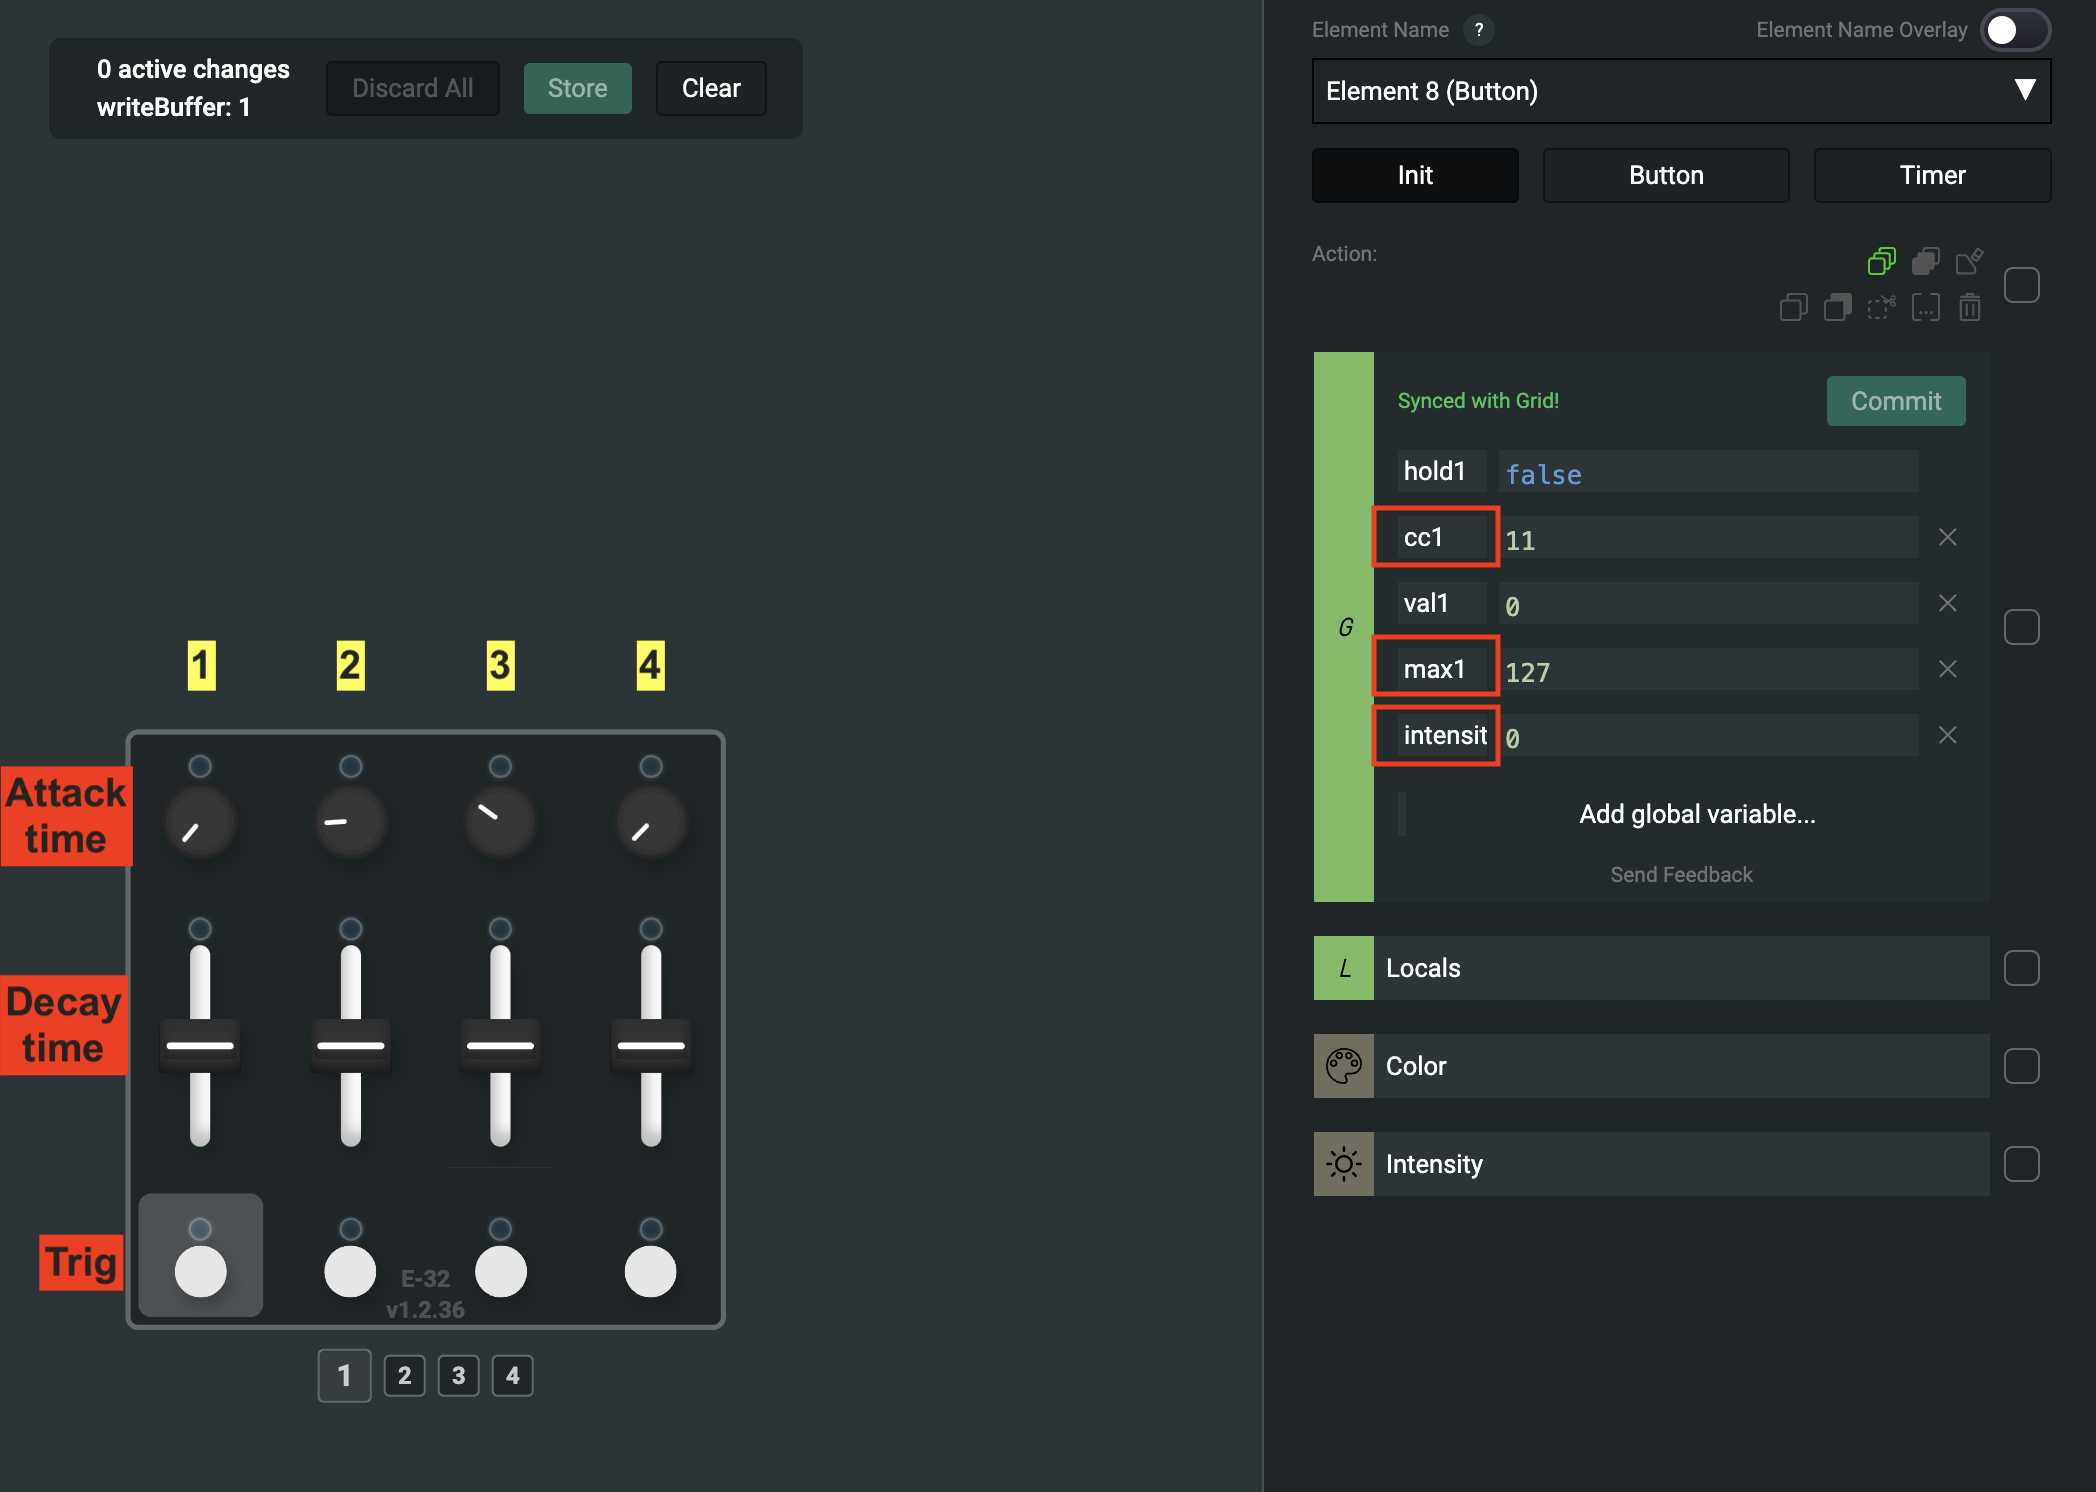
The 'AHR module' profile for the PBF4 allows you to use 4 envelopes triggered by each button. For each button, you can adjust the maximum value, the intensity of increase/decrease, and the CC number.

Guide how to create your own
One of the most effective ways to leverage the power of MIDI automations is through the use of the Timer function combined with Global Variables. By creating a logical loop within the timer, you can increment a global value and repeatedly restart the timer until the value reaches your desired target.