Cubase
This article details a starting experience with Grid and Cubase. Tested on Cubase 11 Pro.
About Cubase
Cubase is a digital audio workstation (DAW) developed by Steinberg. It is widely used for music recording, arranging, editing, and producing for all kinds of music by musicians, producers, and engineers. Cubase has great MIDI capabalities. The Remote Devices section offers great flexibility over MIDI input and output devices and it allows you to map MIDI messages to Cubase functions.
Get started with a MIDI device check
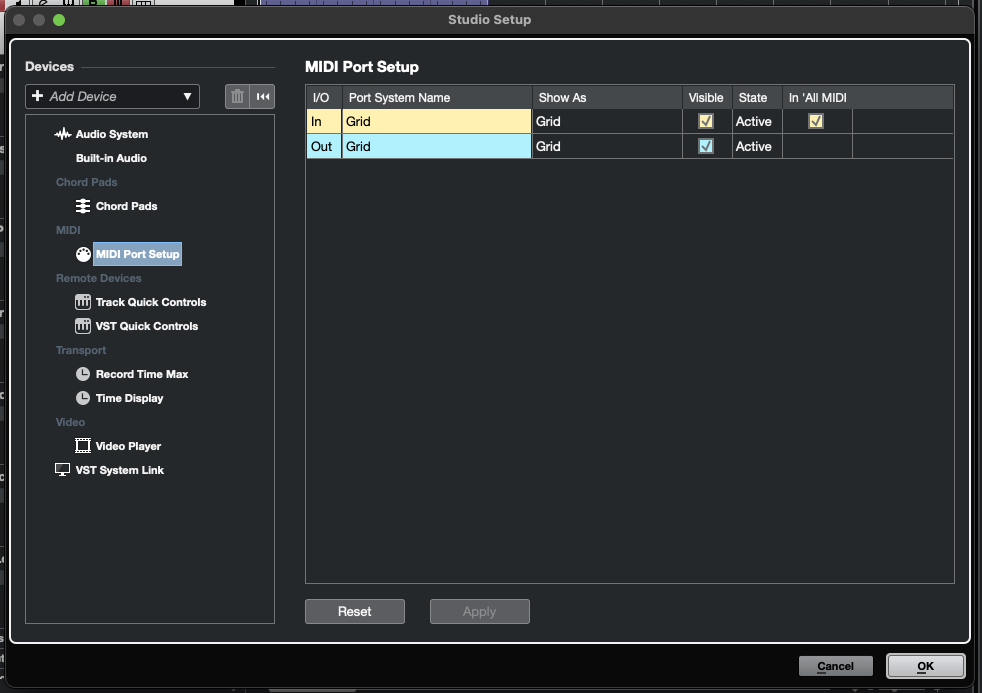
In Cubase menu, select Studio -> Studio Setup..., to upen up the Studio Setup panel, where general MIDI configurations can be viewed.
Select the MIDI Port Setup tab, and check if your Grid controller is listed under MIDI Input. If you don't see Grid listed there, check the troubleshooting articles.
MIDI Learn to Quick Controls
Cubase has a feature called Quick Controls, which allows 8 control elements to be mapped. It allows you to select specific parameters on a channel which you want to control. You can assign MIDI messages to these parameters, and control them with your Grid controller.
Tick in the Learn checkbox, and move a knob on your Grid controller. The Learn checkbox will enable MIDI learn in Cubase, so your interaction with the control elements are recorded. Click on a row, tweak a control element, repeat.
In each Quick Control row, under the flags the R should be activated, so the MIDI messages are received by Cubase. If we want to send MIDI messages back to Grid, the T flag should be activated too.
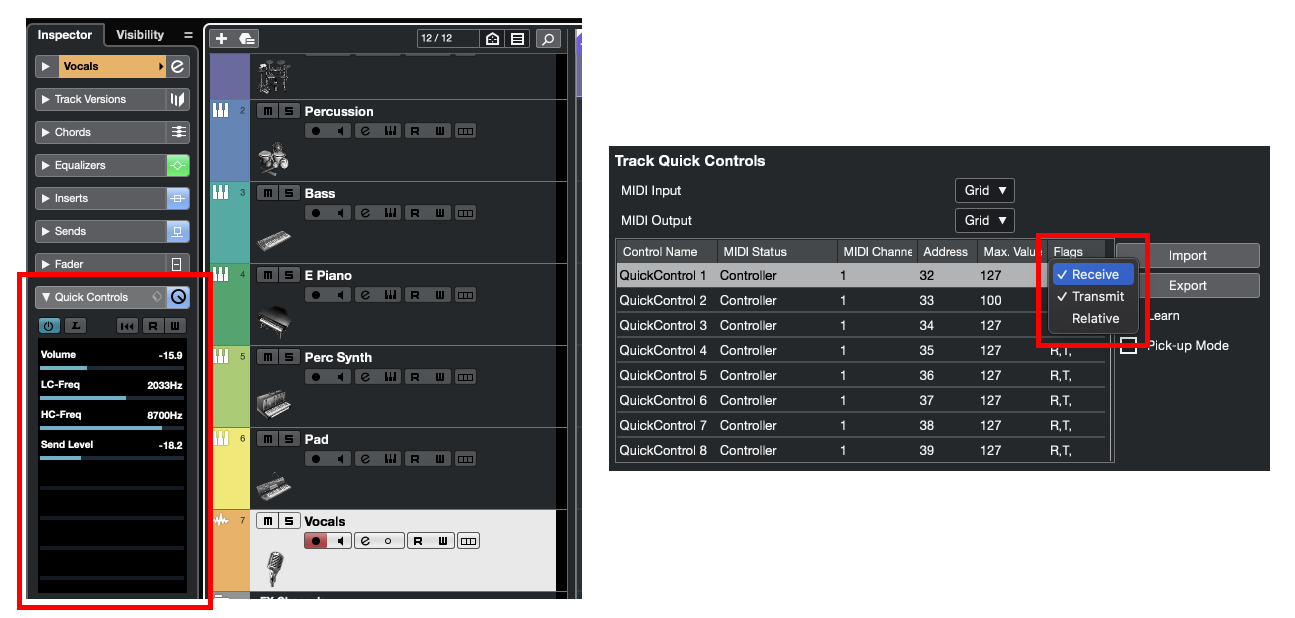
Right: Transmit and Receive are activated, so MIDI values can be received and sent back to Grid
Control same type of parameters with one control element
Let's say you want to control the Volume of channels with the first control element on your module. In the Quick Controls panel, add Volume to channels in Cubase.
Control with potentiometers and faders
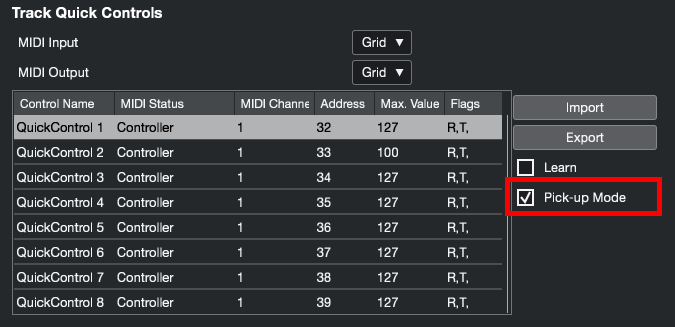
If we are using a potentiometer or fader for this, tick the Pickup option in the Quick Controls settings panel.
When pickup mode is activated, the control element will only affect the parameter if the incoming MIDI value matches the current value. This setting will avoid value jumps when you change the parameter with your mouse or switch between the selected channels.
We are working on a setting for absolute control elements (potentiometers, faders) which will enable smooth scaling for pickup values. This way you will be able to have a similar freeform control over parameters without value jumps, like you would have with encoders.
Control with relative encoders
Encoders can send out relative MIDI values. Using relative encoding, the encoder sends messages which are identified by Cubase as +1 or -1. This way, the encoder can be used to control parameters without value jumps.
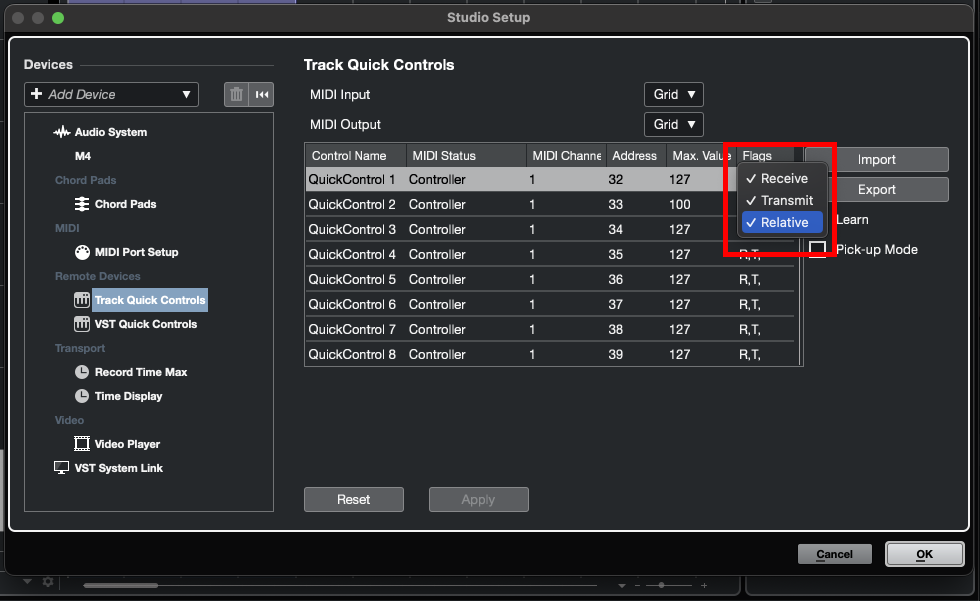
You have to setup two things to make this work:
- Activate the Relative flag in the Quick Controls settings panel
- Set the encoder mode in Editor to Relative 2's Comp
In Grid Editor, we pick Relative 2's Comp encoding algorithm which is 2 in the Encode Mode action block. We can put this action block as the first action under the encoder's init event.

Send back value state to Grid
Make sure, you have Transmit alias T flag activated in the Quick Controls panel, so the MIDI messages are sent back to Grid.
To setup bidirectional communication between Cubase and Grid, follow the MIDI RX mini guide.
Testing the setup, create two channels in Cubase. Follow these hints, where your it's applicable:
- In Cubase: Add Volume and Mute to both channel's Quick Controls
- On Grid: Turn up a mapped knob on your Grid controller, and see if the volume of the first channel is changing
- On Grid: Press a mapped button, and see if the mute state of the first channel is changing
- In Cubase: Select the second channel, and mute it with your mouse. The state should be reflected on the mapped button's LED.
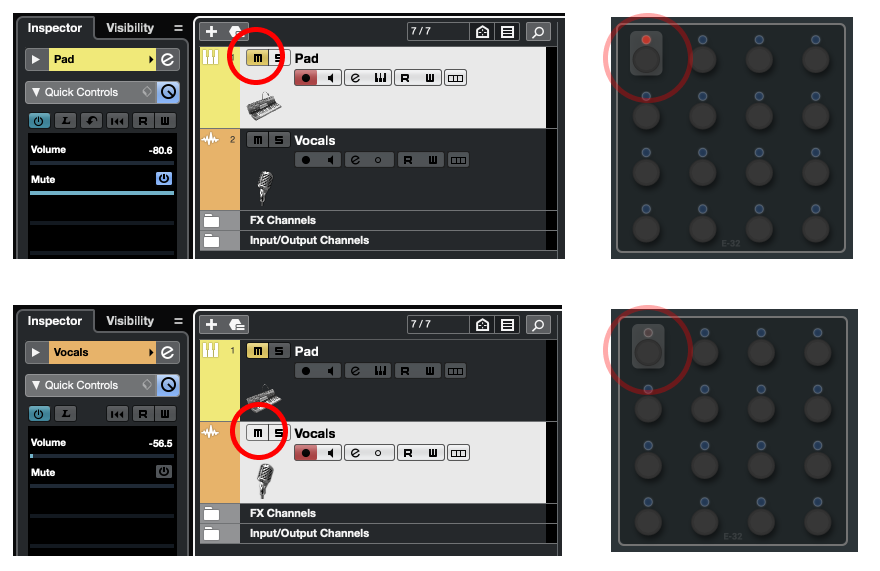
Bottom row: selected channel mute is not active, button LED is dim