MIDI RX setup for Ableton
Overview
Digital audio workstations, VST plugins and other audio software can send out MIDI. Grid can receive and process these incoming MIDI messages. This article will show an example configuration made with Grid and Ableton.
The MIDI receive functionality can be accessed through the midi rx event in the system events tab. The midi rx event is where actions can be configured to react to received MIDI data.
Actions triggered by system events are unique to each module. To have a control surface where each module reacts to MIDI, you have configure each module's midi rx event.
Setting up
Usually the MIDI data sent out by audio software will have the MIDI message in the following format: Command, Parameter 1 (CC or Note), Parameter 2 (CV or Velocity).
The command itself contains the channel information. Control Change 178 means that the MIDI command is 176 and channel is 2.
To enable and see MIDI OUT in action on the DAW's side:
- Enable MIDI OUT for Intech Studio: AC (Grid)
- Map a control element on a Grid controller to a parameter
- You should see a blinking a indicator for sending MIDI OUT

To see results in Grid Editor here are few tips:
- Select the control element which are already MIDI mapped (Ableton only sends messages from mapped elements)
- Under system events choose the midi rx event
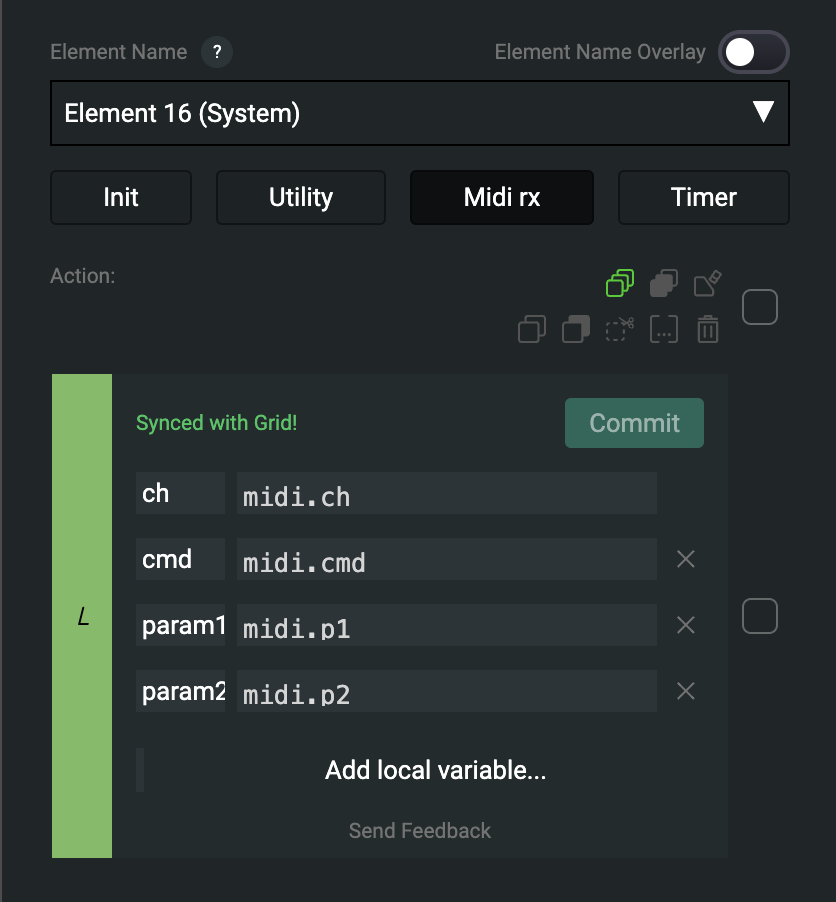
Add a Codeblock action and call the print function on the variables found in the Local Variables action
print(ch,cmd,param1,param2) Codeblock
The variables defined in the Local Variables action are on the module by default.
- Open the debug panel on the left
- Upon interacting with the control element's mapping, you should see MIDI data.

Tutorial: Creating an A/B send encoder with RX
We will create a configuration available in the Cloud profile: 'Ableton encoder A/B sends midi rx tutorial'
With this configuration, we can adjust Send A and Send B using one encoder. Send A will be adjusted by rotating the encoder, and Send B will be adjusted by pushing and rotating the encoder.
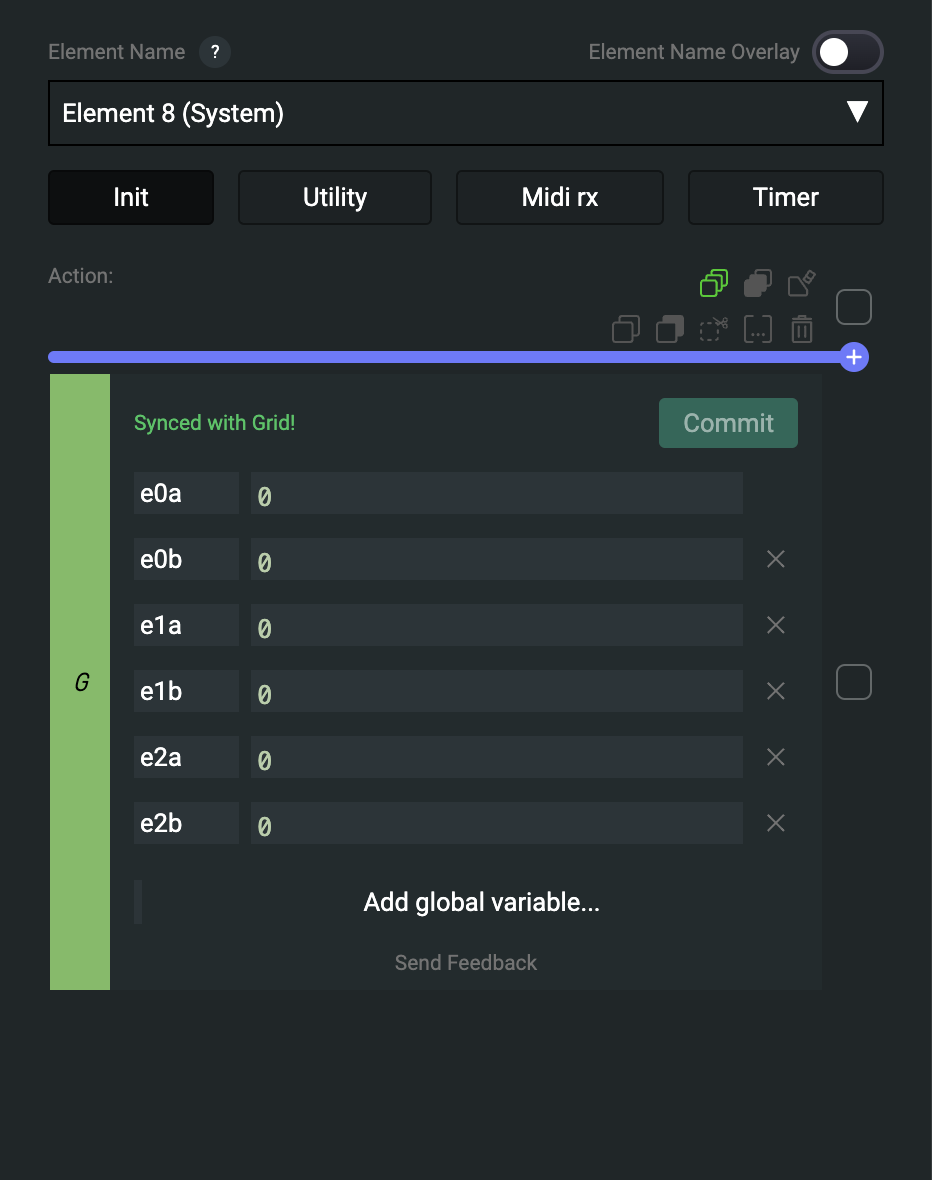
- First, we need to create global variables in the system initialization. These variables will store the incoming MIDI values (e.g., the first encoder Send B is e0B).
Let's assign two different MIDI CCs to the encoder: one MIDI CC for when the encoder is rotated, and a second CC for when it is pushed and rotated. Additionally, for visual feedback, let's assign specific colors to these actions. Make sure not to remove the Locals and Intensity action blocks, as we need those to remain intact.
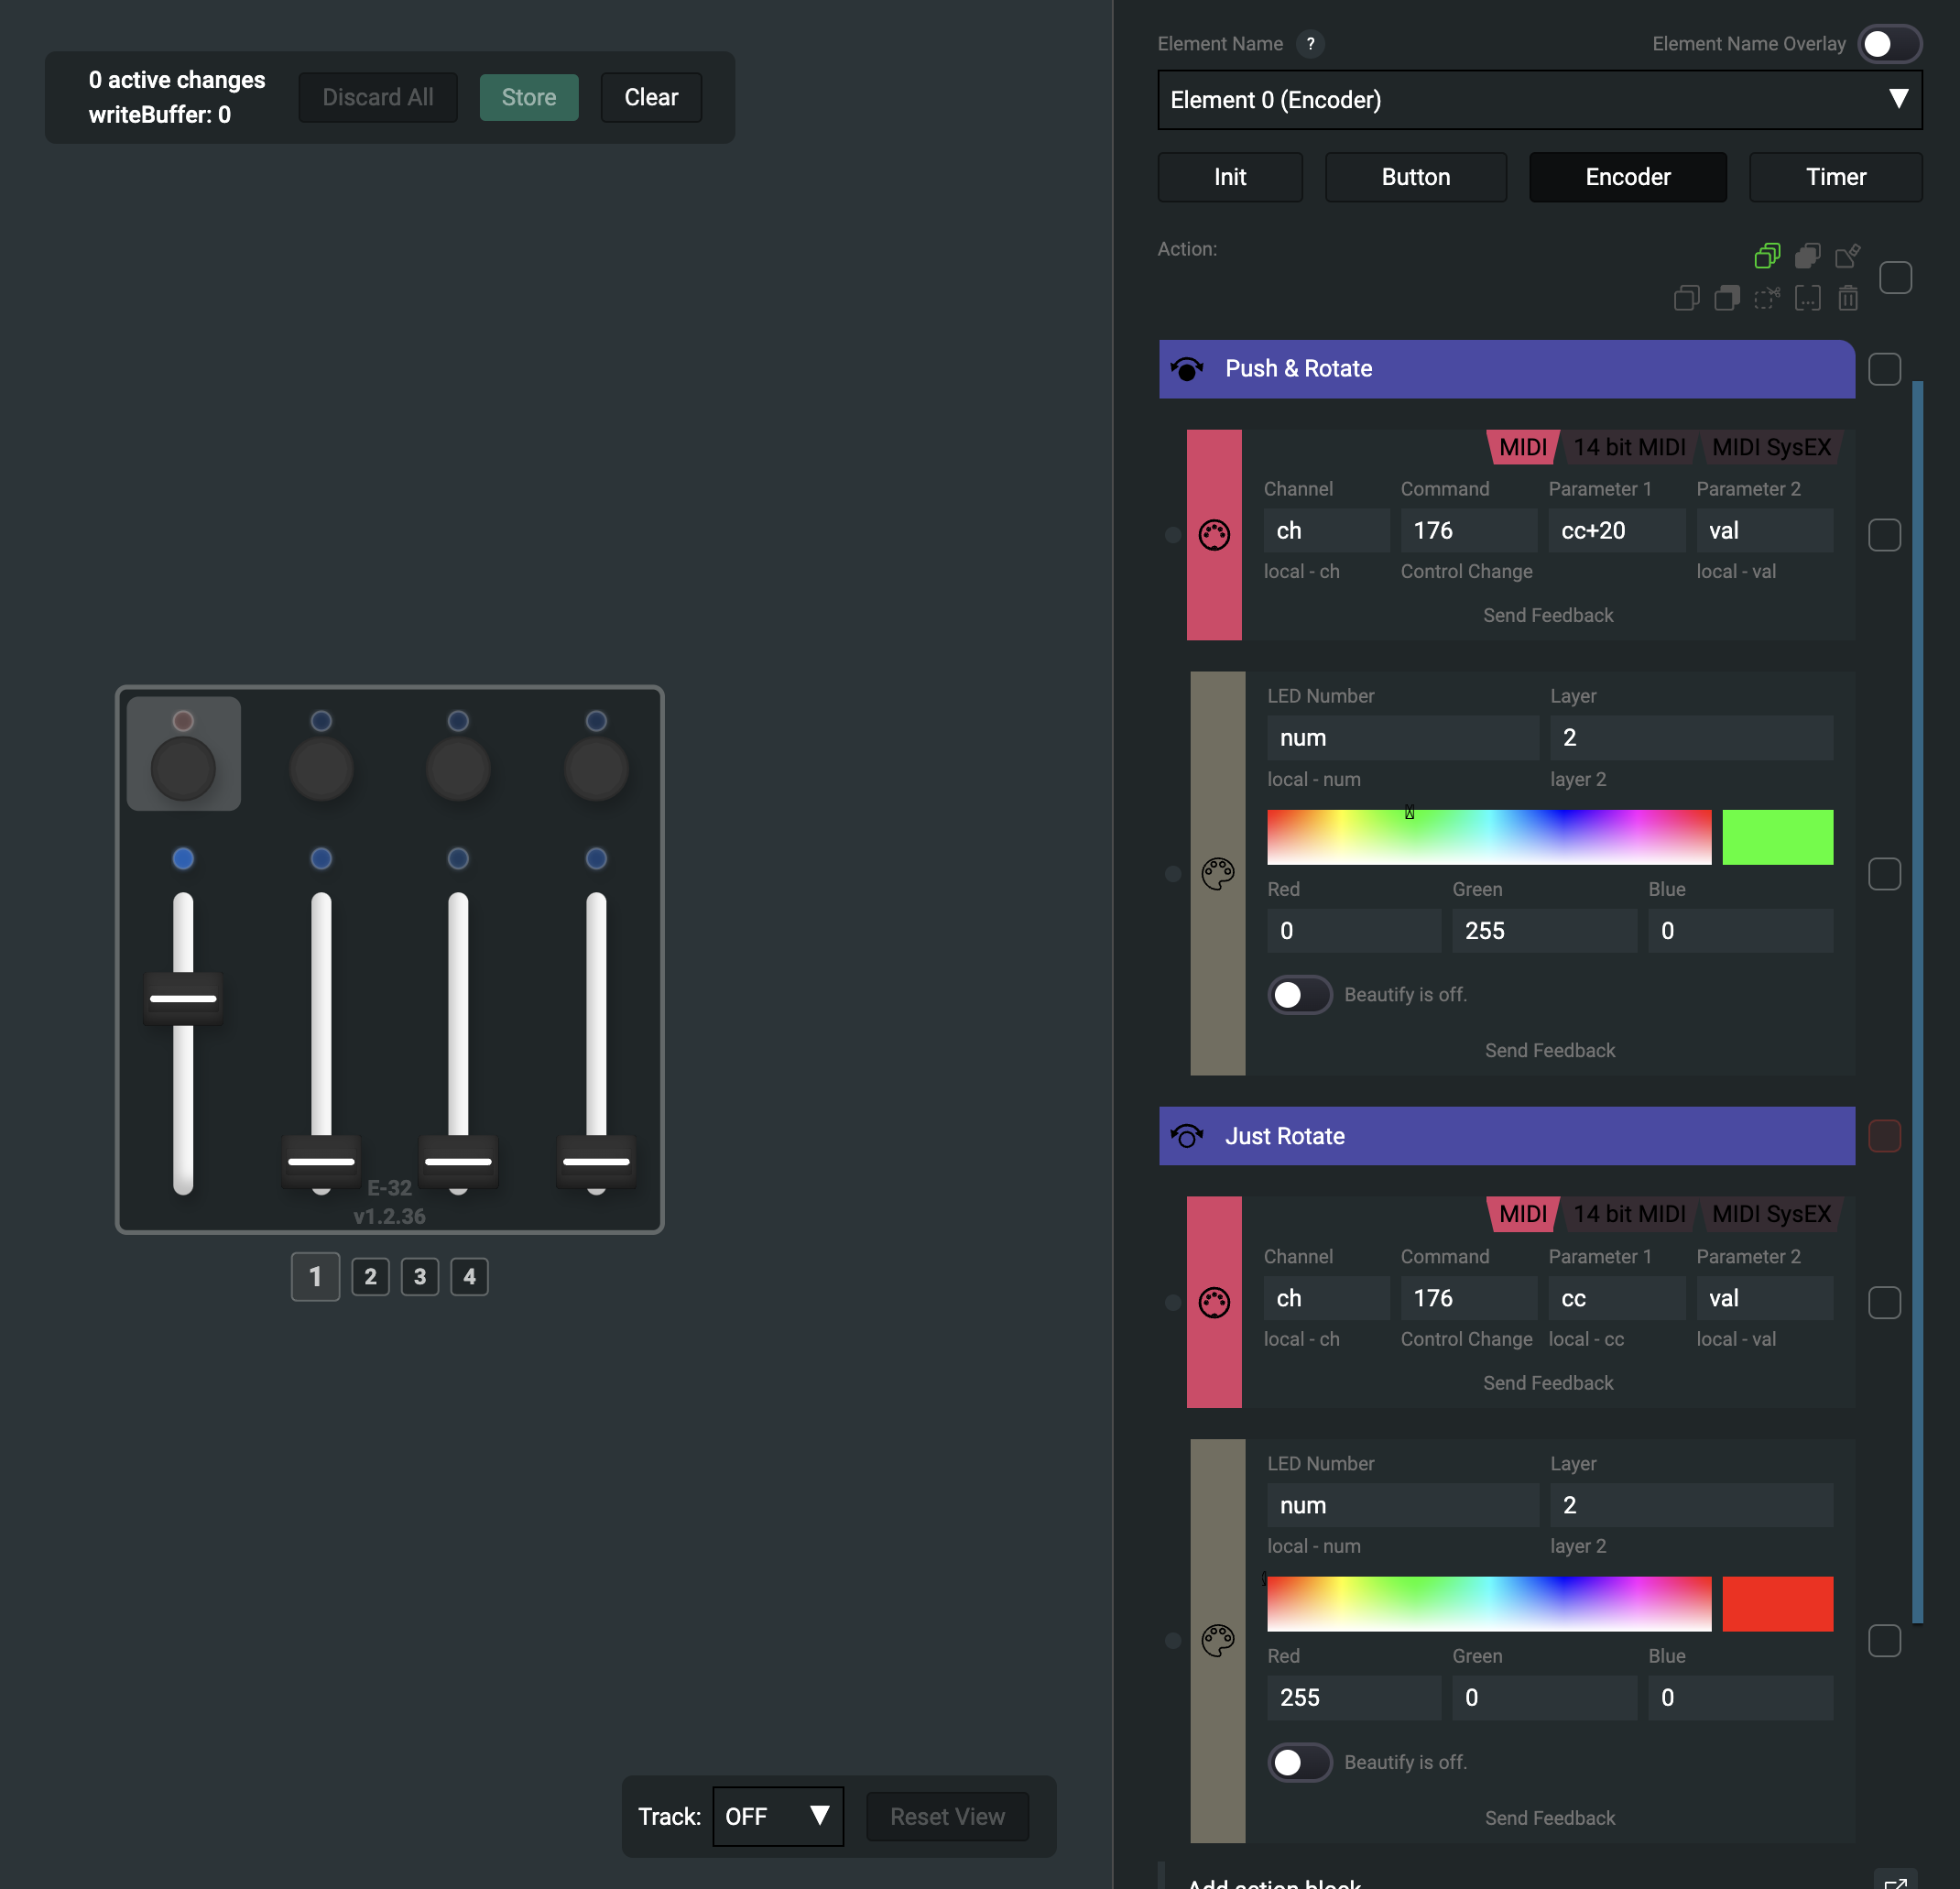 Add two MIDI blocks and an LED color block in the Push/Rotate block.
Now, when the push or release action occurs in the encoder, we need to assign the stored value from Ableton to the encoder value. Additionally, we should delete the MIDI block here, as we don't want to assign random MIDI CCs in Ableton.
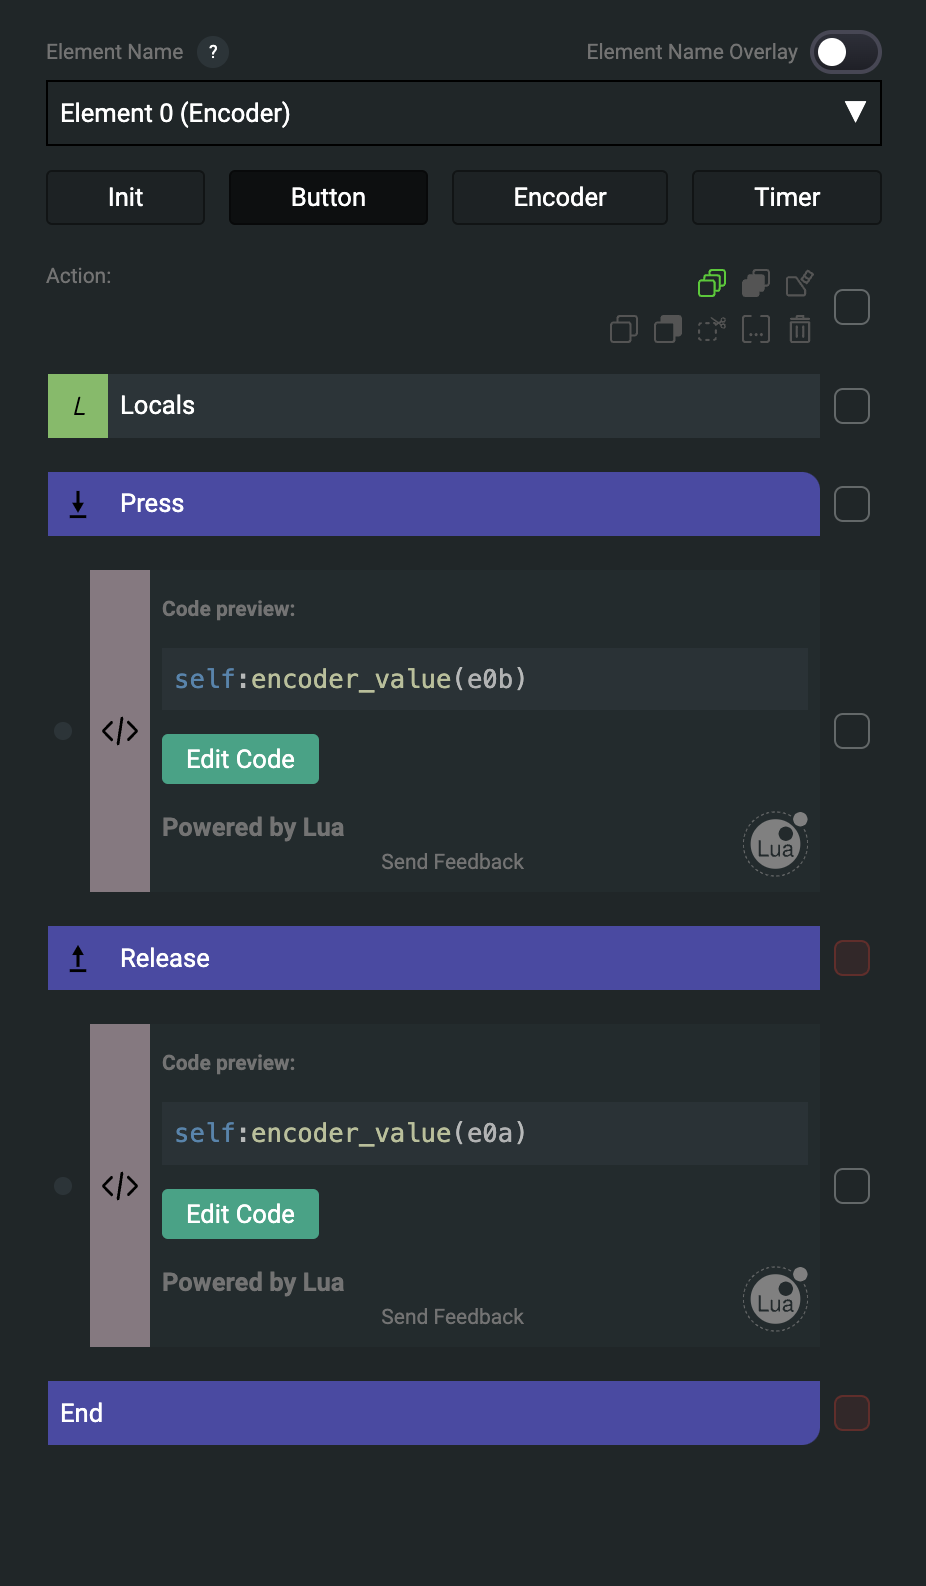 On the Button event, delete the MIDI block and set the encoder value when pressed or released.
MIDI map Send A to the encoder's rotation, and Send B to the push and rotate action.
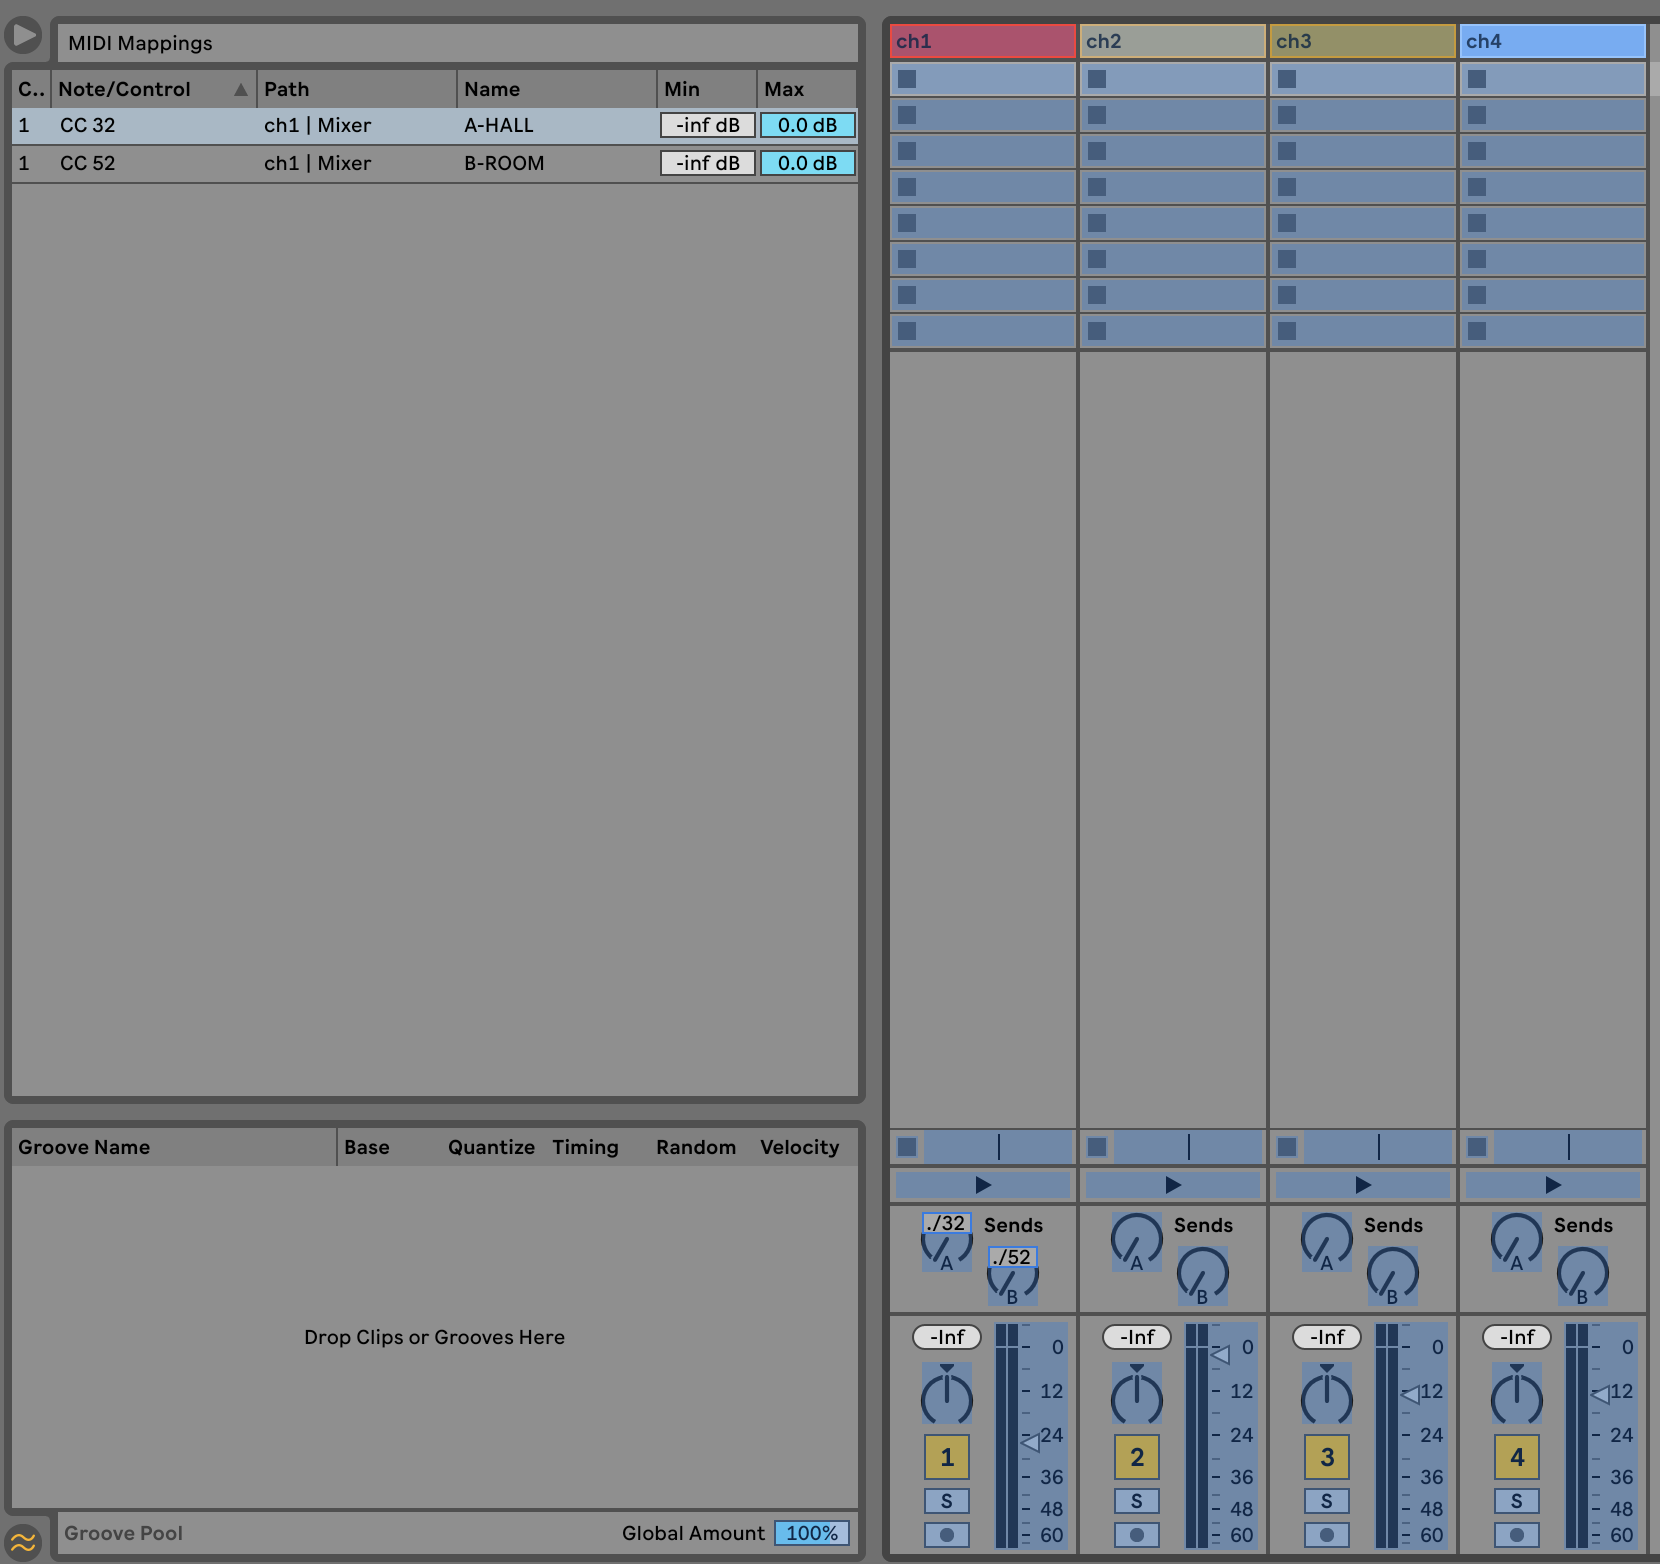
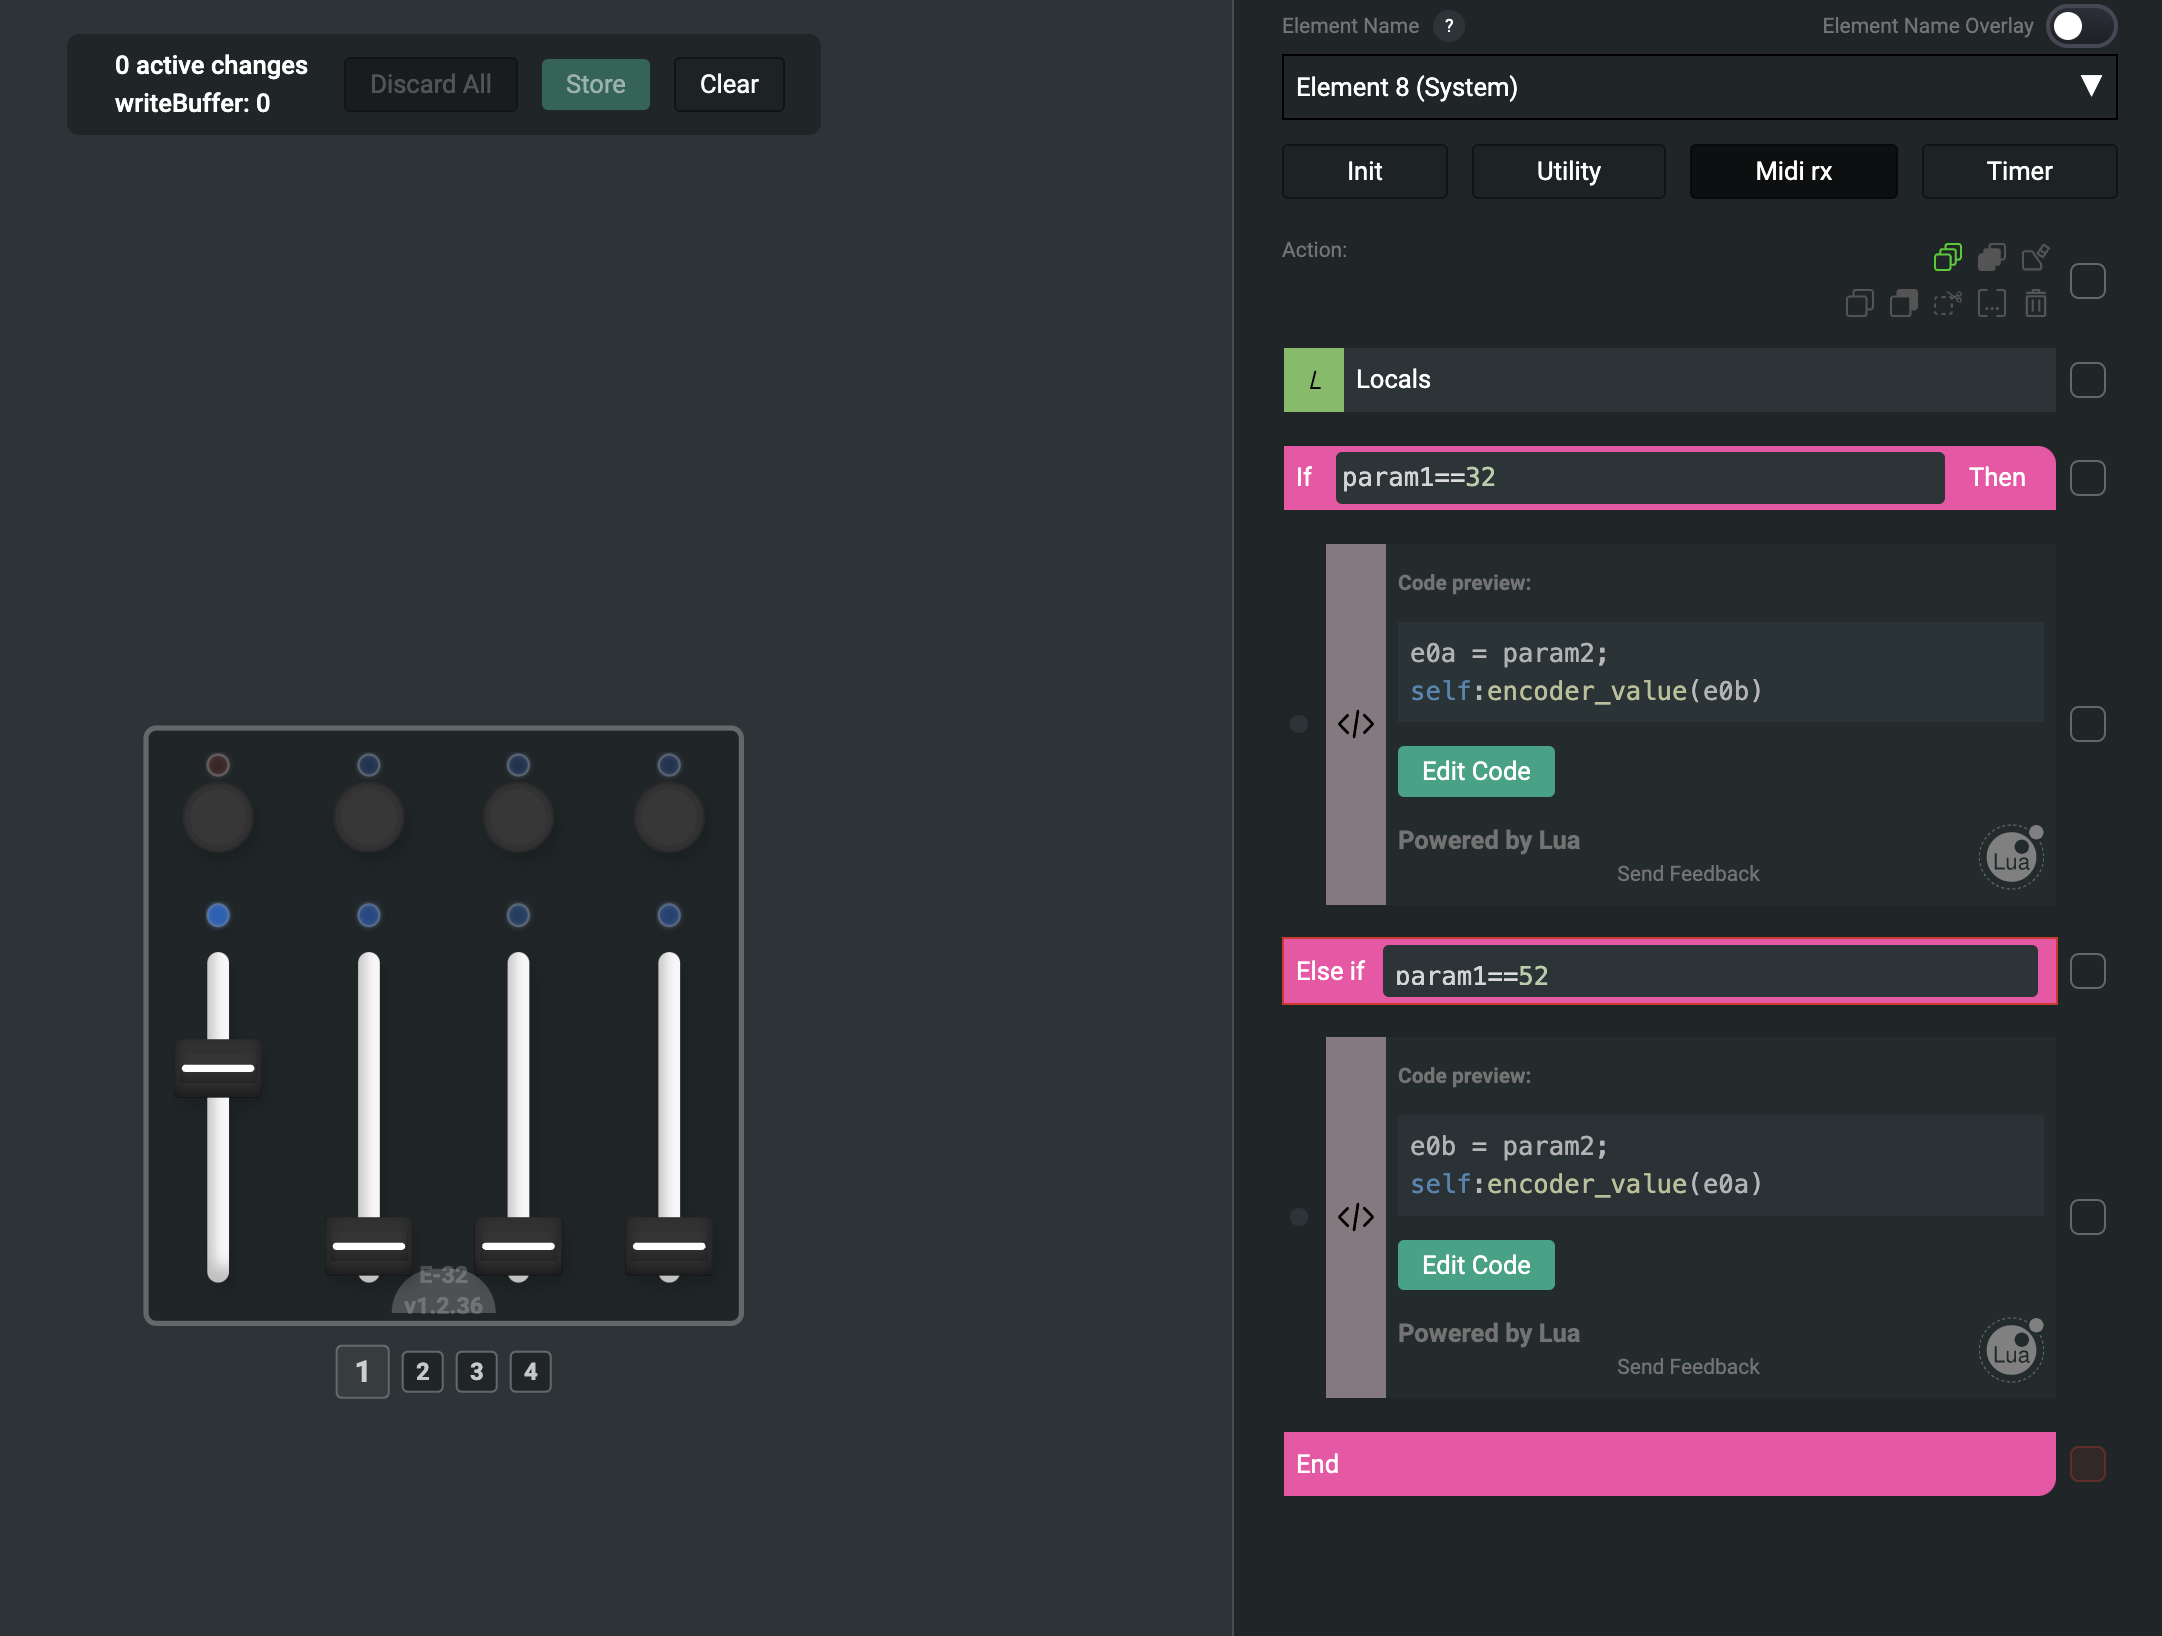
- Now we've reached the section where we receive MIDI RX messages! When Send A or Send B is adjusted, Ableton sends the corresponding MIDI CC message (the same CC we send—check the MIDI monitor!). For example, when the first encoder sends a value of 32, we assign the incoming value to both the global variables and our encoder value. This ensures that whatever happens with the sends, we always know the state of Send A and Send B, and the values remain stable without jumping.