1.0: Editor overview
This article will guide you through the first steps of understanding Editor, our configuration software for Intech Studio products.
Please visit Grid Editor Web App - if you would like to try Grid Editor with virtual module.
Navigating the Editor
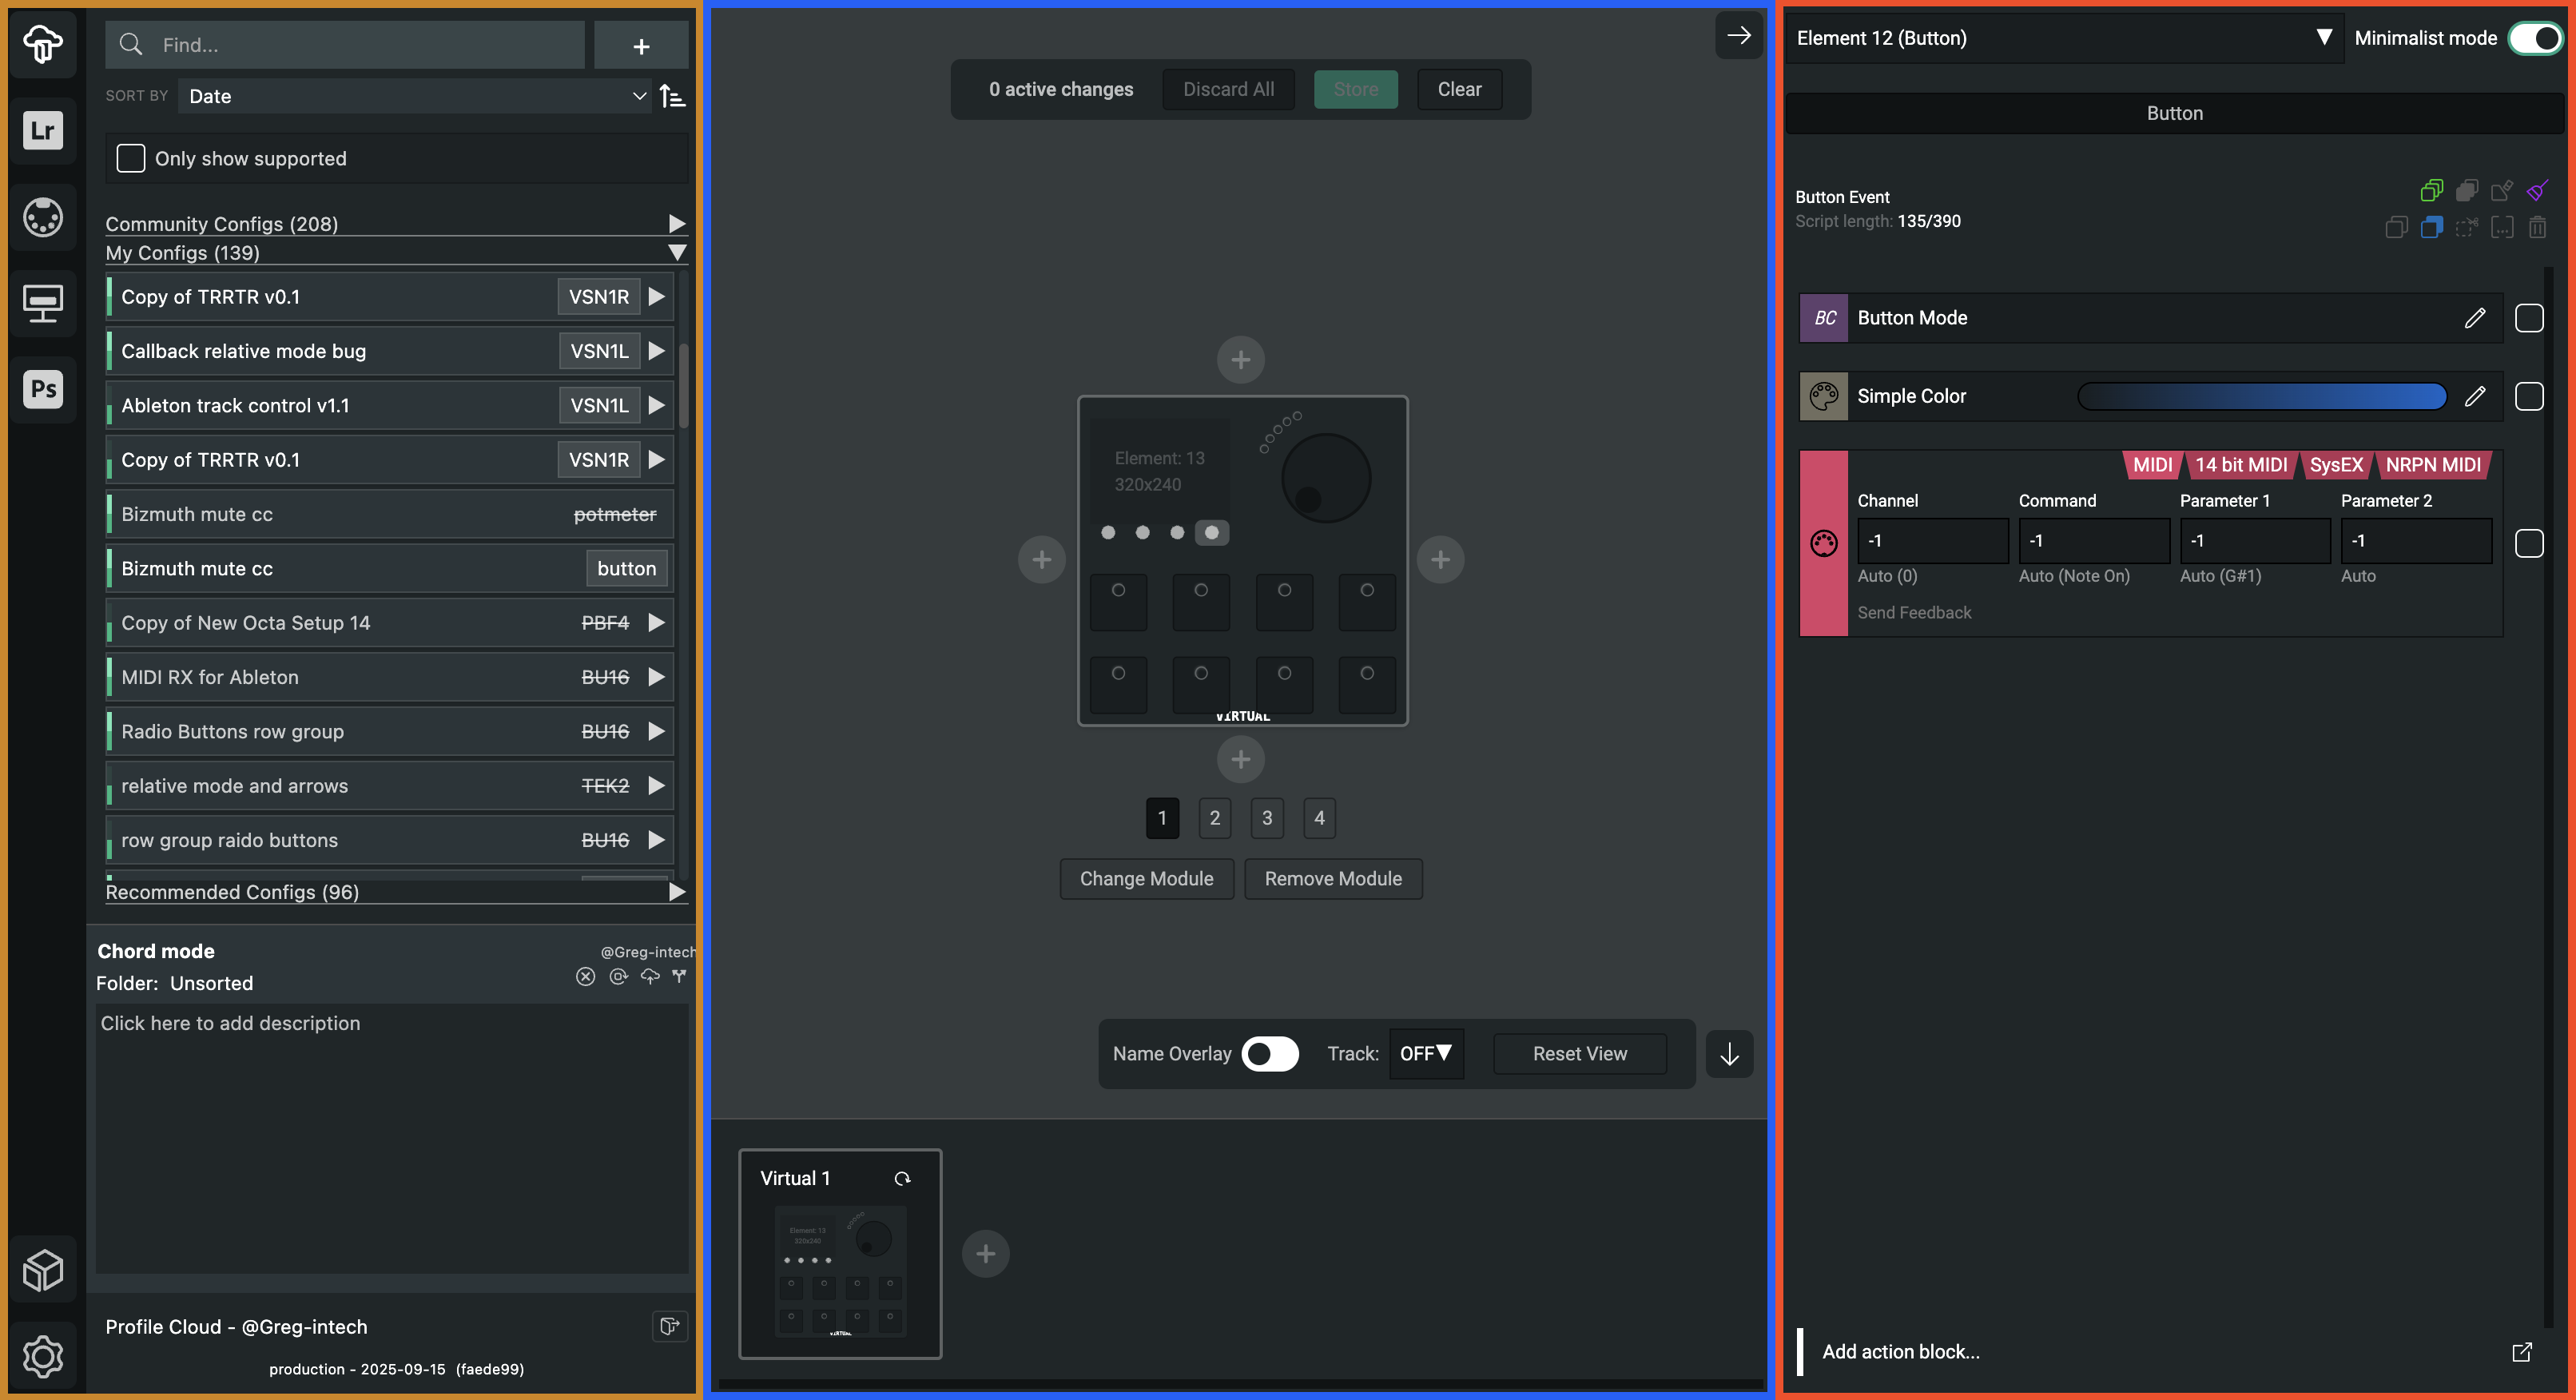
At a glance, Grid Editor has 3 visually distinct panels, each with its own purpose:
- Left panel: Profile Cloud, MIDI monitor, Package Manager and Preferences on the sidebar
- Center panel: Module layout in the middle
- Right panel: Configuration of the selected element on the right panel
- Left panel: Choose between:
- Profile Cloud – Manage your saved configurations, browse the creations of others. Load and try new configutaions!
- MIDI Monitor – Check and troubleshoot MIDI messages. (You might have to enable this Package in the Package Manager)
- Package Manager – Activate and use Packages, e.g. Profile Cloud, Lightroom Classic.
- Preferences – Change the Preferences of the Grid Editor software. Enable developer options.
- Center panel: Displays your connected or virtual modules. Always highlights the selected Element with a grey overlay. Here you can also access Pages, fiddle with interaction tracking and primary module operations.
- Right panel: Shows the configuration of the selected Element. Changing the configuration of the module happens here, one Element at a time.
Interacting with Editor
To start configuring your module, you can either click on a control element (knob, button or fader) within the Center panel or interact with the hardware control element in the physical world. Both of these actions will cause the control element to receive a highlight and its configuration will appear on the right panel.
By default the interaction tracking will track both physical and digital interactions with the module.
Setting up interaction tracking
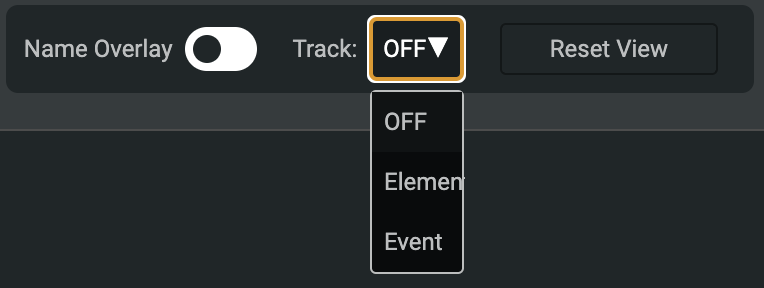
Based on the interaction tracking panel setting, the Editor will change the active/selected Element - whenever you interact with the hardware. Interaction tracking settings:
- OFF mode results in hardware interactions are not being tracked by the Editor, the only way to change the selected element is to click on it in Editor.
- Element mode tracks only control element changes, but not event changes.
- Event mode will follow how you interact with the hardware, so a button press will show the button event, an encoder turn will show the encoder event.
Creating a configuration
Designing your own configuration is done inside the Configuration panel on the right. Whenever Grid is plugged into Grid Editor the configuration of the selected/default control element is loaded into Editor from Grid memory and becomes editable.
When you interact with an element, the config panel lets you easily adjust it thorught the Action blocks.
For example, you can set the Mode, change the Color, and define which MIDI message to send.
You can also add action blocks from Lightroom, Photoshop, or other packages if they are activated in the Package Manager.
Changes made in Editor have to be manually Stored or Saved to become permanent.
Store it!
- The changes are sent to the hardware after making them in Editor, so you can try them in action.
- BUT the changes are not saved in Grid memory until clicking Store when active changes are present.
- If you don't Store your changes, they will be lost when you disconnect your module.
- While active changes are present, you can not change Pages.
- Storing sets the number of active changes in Editor to 0, enabling you to change Pages freely again.

Save it!
Use the Profile Cloud to save your configuration, so you can recall it anytime and never lose your progress.
The Cloud stored configurations locally even if you're not logged in, so it's always a good idea to keep saves.
Changing Grid configurations with Editor
Minimalist Mode
Minimalist Mode provides a simplified view of the Editor.
Turning it on hides complex Actions and Events, keeping only the essential parts of Editor in focus.
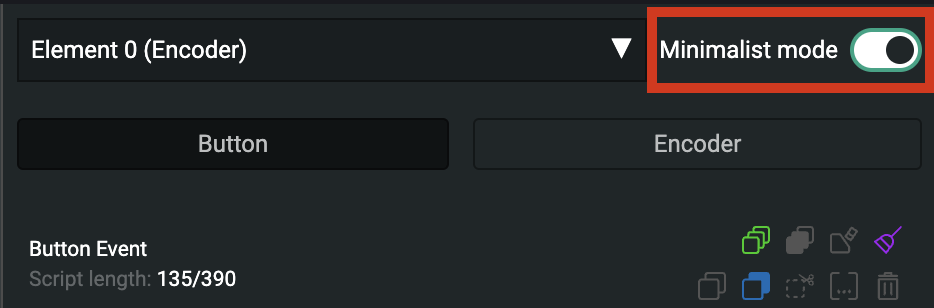
You can turn it on or off in the top-right corner of the Editor window, and it will remember your preference for next time.
Overview
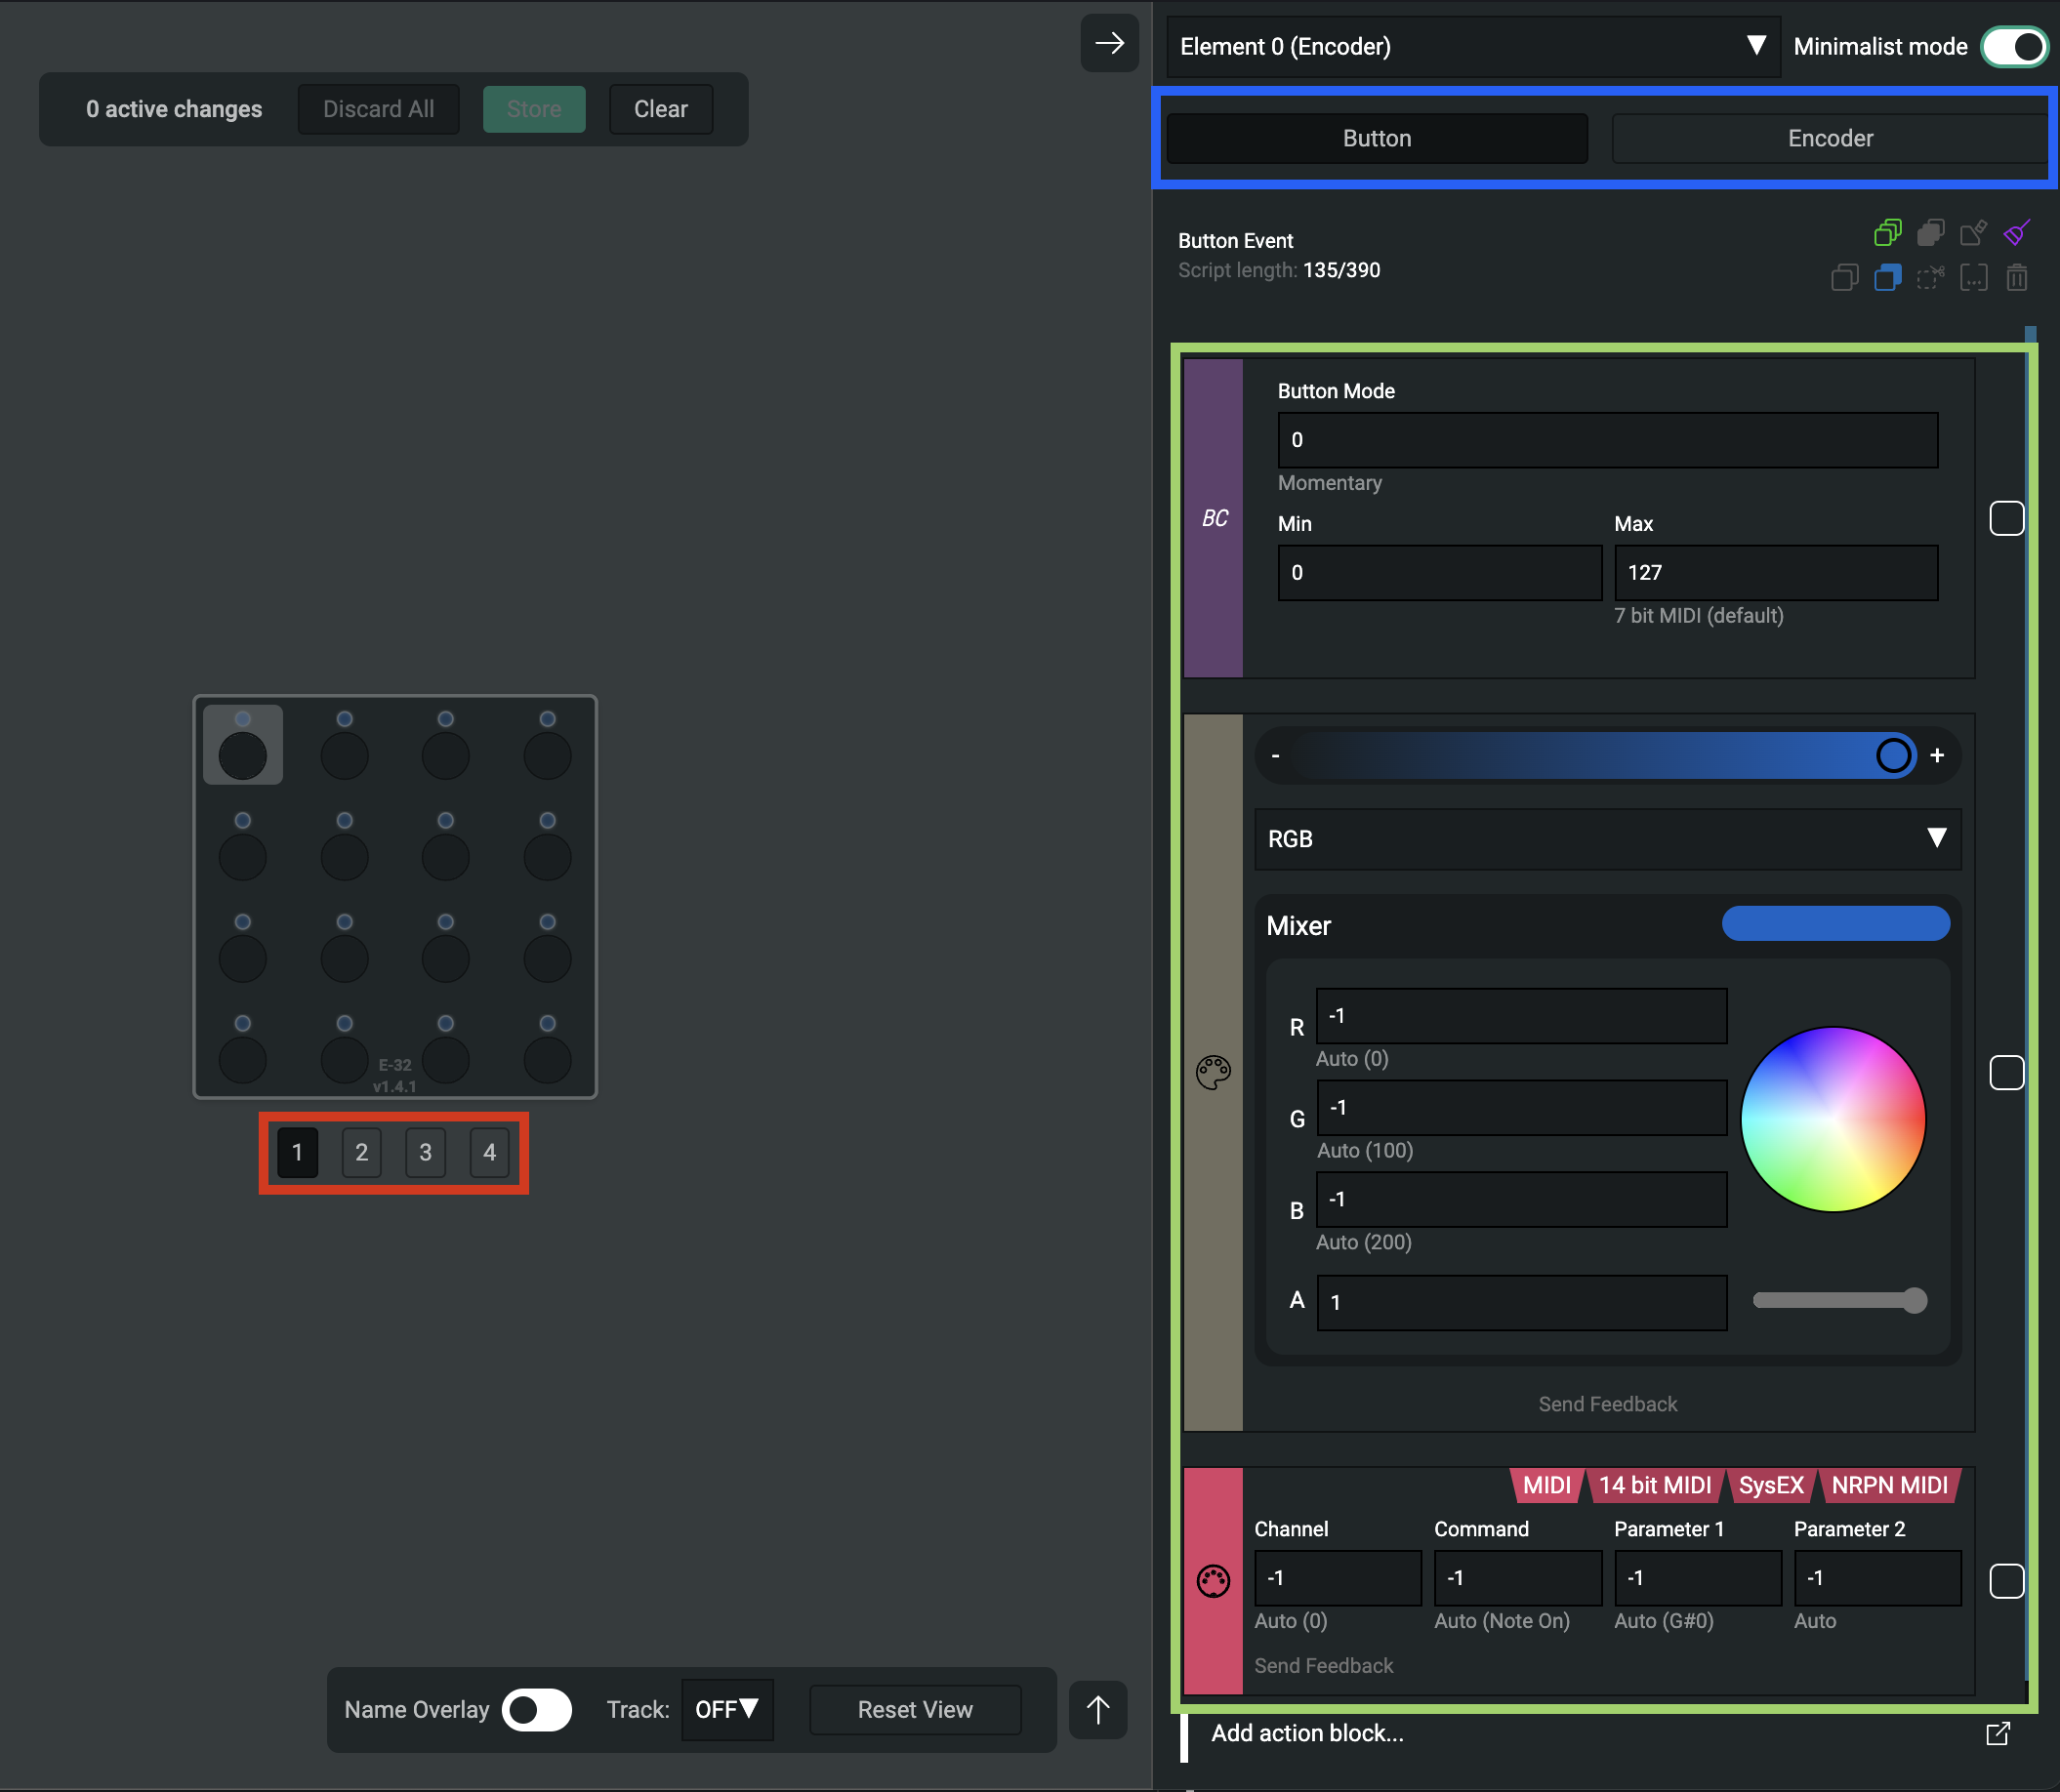
While creating your Grid configurations, your main workspace will utilize the following panels:
- Pages tabs - shows the active Page of your Grid setup, changing the Page reloads config from Grid;
- Event tabs - each element has its own Events that usually run on user interaction;
- Actions - the basic building blocks of Grid profiles, which can be configured under each Event.
Events and how to make Grid do things?
- Physical interaction (e.g. turn a potentiometer)
- Which causes Grid to trigger Events (e.g. Potmeter Event runs)
- Events make their Action Chains run (e.g. potmeter triggers MIDI Action)
- Actions in the Action Chain make Grid do things. (e.g. MIDI Action sends out a MIDI message)
The configurable part of the process are the Actions under each Event.

The Setup Event
(Hidden in minimalist mode)
After loading a Page - either by connecting the hardware to a power source or changing a page - the Setup event runs on the module. After this initialization other events can be triggered.
The Potmeter, Button, Encoder, Endless Events
The potmeter, button, encoder, Endless events are triggered by your interaction with the hardware, with the specific control elements. Rotating an encoder will cause the encoder event to trigger. If you press the button, the button event runs.
The Timer Event
(Hidden in minimalist mode)
The timer event can be called with the timer start action block and related functions. With the timer, we can call actions after a period of time, build sequencers or do all sorts of time related applications.
You can learn more about the different events in the Events section.
System Events
(Hidden in minimalist mode)
Looking at the system events, utility event is triggered by pressing the side utility button.
The configured actions run on these events
Each Event can have multiple Actions configured. These Actions are executed in the order they are configured, from top to bottom. At the moment there is a 390 character limit for each Action Chain for configuration length.
The Actions are combinations of Lua functions under the hood on Grid. To learn about action types, check out the Actions section.
Element Mode Action block
Each Event has a unique Element Mode Action, where you can change or flip the Min Max value, use relative or absolute mode, change their Sensitivity or Velocity.
Simple Color Action block
Pick a color that you like or add more colors to the mix with Simple Color. Simple Color is simple to use but you can achieve complex settings, for example you can add the minimum max and also the middle position color of an element. More about the Simple Color...
The Message Action Block
In the factory setup, you will see the MIDI Action Block, which is mainly used for musical software and hardware. It also supports other software, for example, Resolume Arena VJ software.
If you want to send messages to software that doesn’t have MIDI support, such as Lightroom, you can add the Lightroom Action Block after activating the Lightroom Package in the Package Manager.
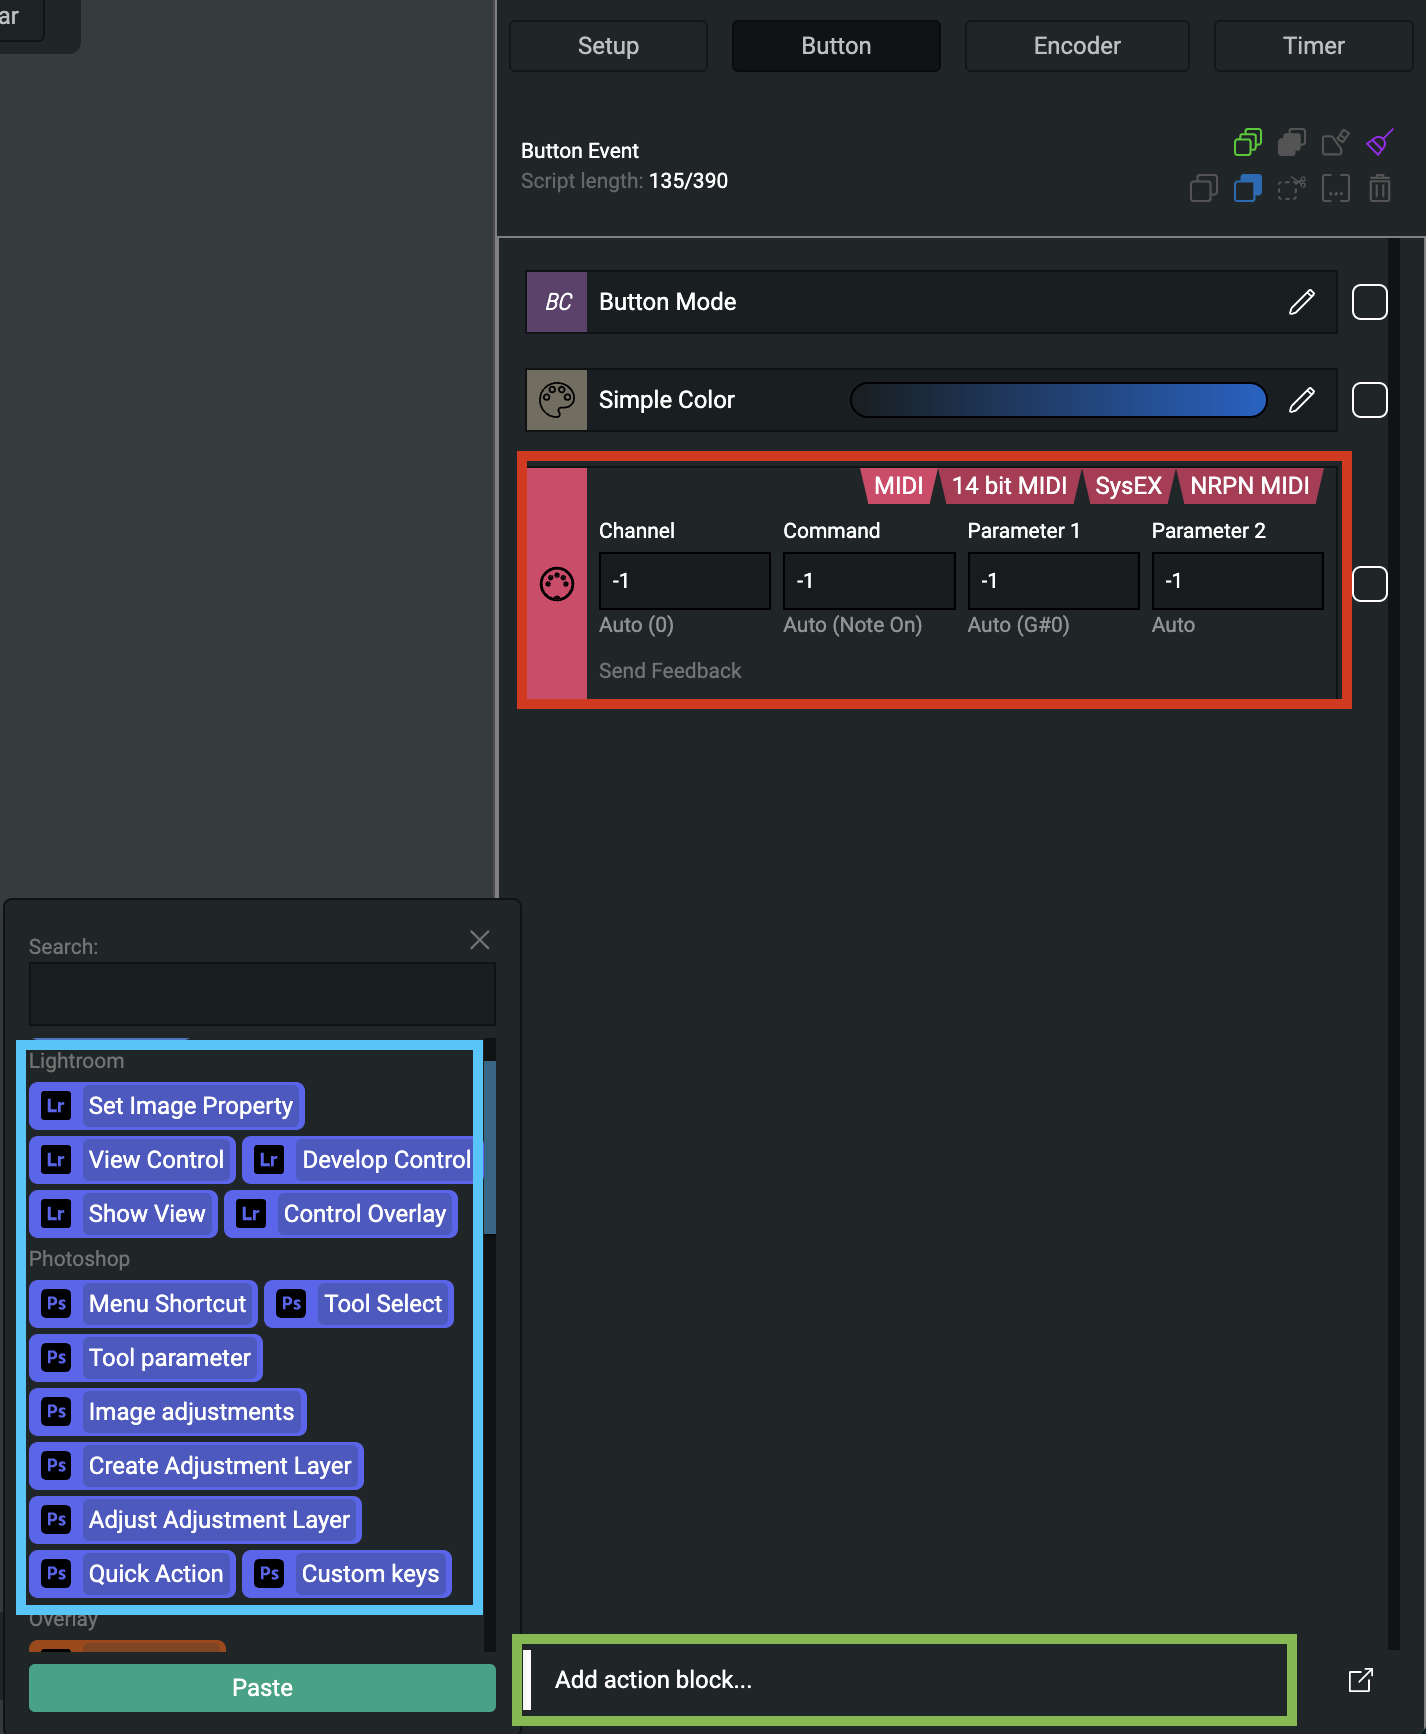
green: Add other action block
blue: Lightroom and Photoshop action blocks
Wrap up
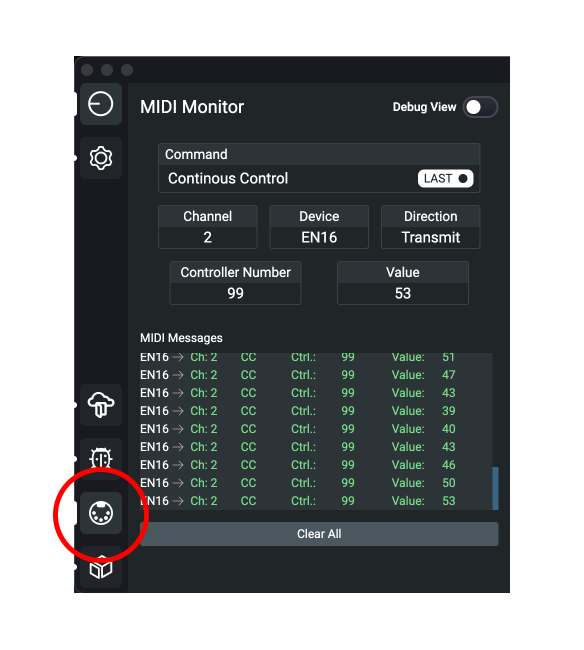
If you use the MIDI Action Block, you can check your messages in the MIDI Monitor.
MIDI Monitor is also a package, so you will need to activate it in the Package Manager.
Completing a configuration
Store the changes
The primary module operations panel should shows the active changes, which are not saved on the module. To save these changes, click on the Store button.
The Discard button will discard the active changes and reload the configuration from the module. This is useful, if you want to start over or you've made a mistake.
⚠️ Clear will clear the active page on all connected modules and the firmware default profile will be reloaded on the module. Before clearing your configuration, it's good practice to backup your work by creating a Profile.

After hitting Store, you can disconnect - or change the page - on the module. The configurations you applied to the module will be saved on the module's memory and it will be recalled when you connect the module again.
The Editor is crucial while configuring the unit, but after the configurations are made it can be closed. Grid's MIDI and Keyboard related functions will work without the Editor. On the other hand, Packages require the Editor to be open in the background, but this will always be indicated on the installed package.
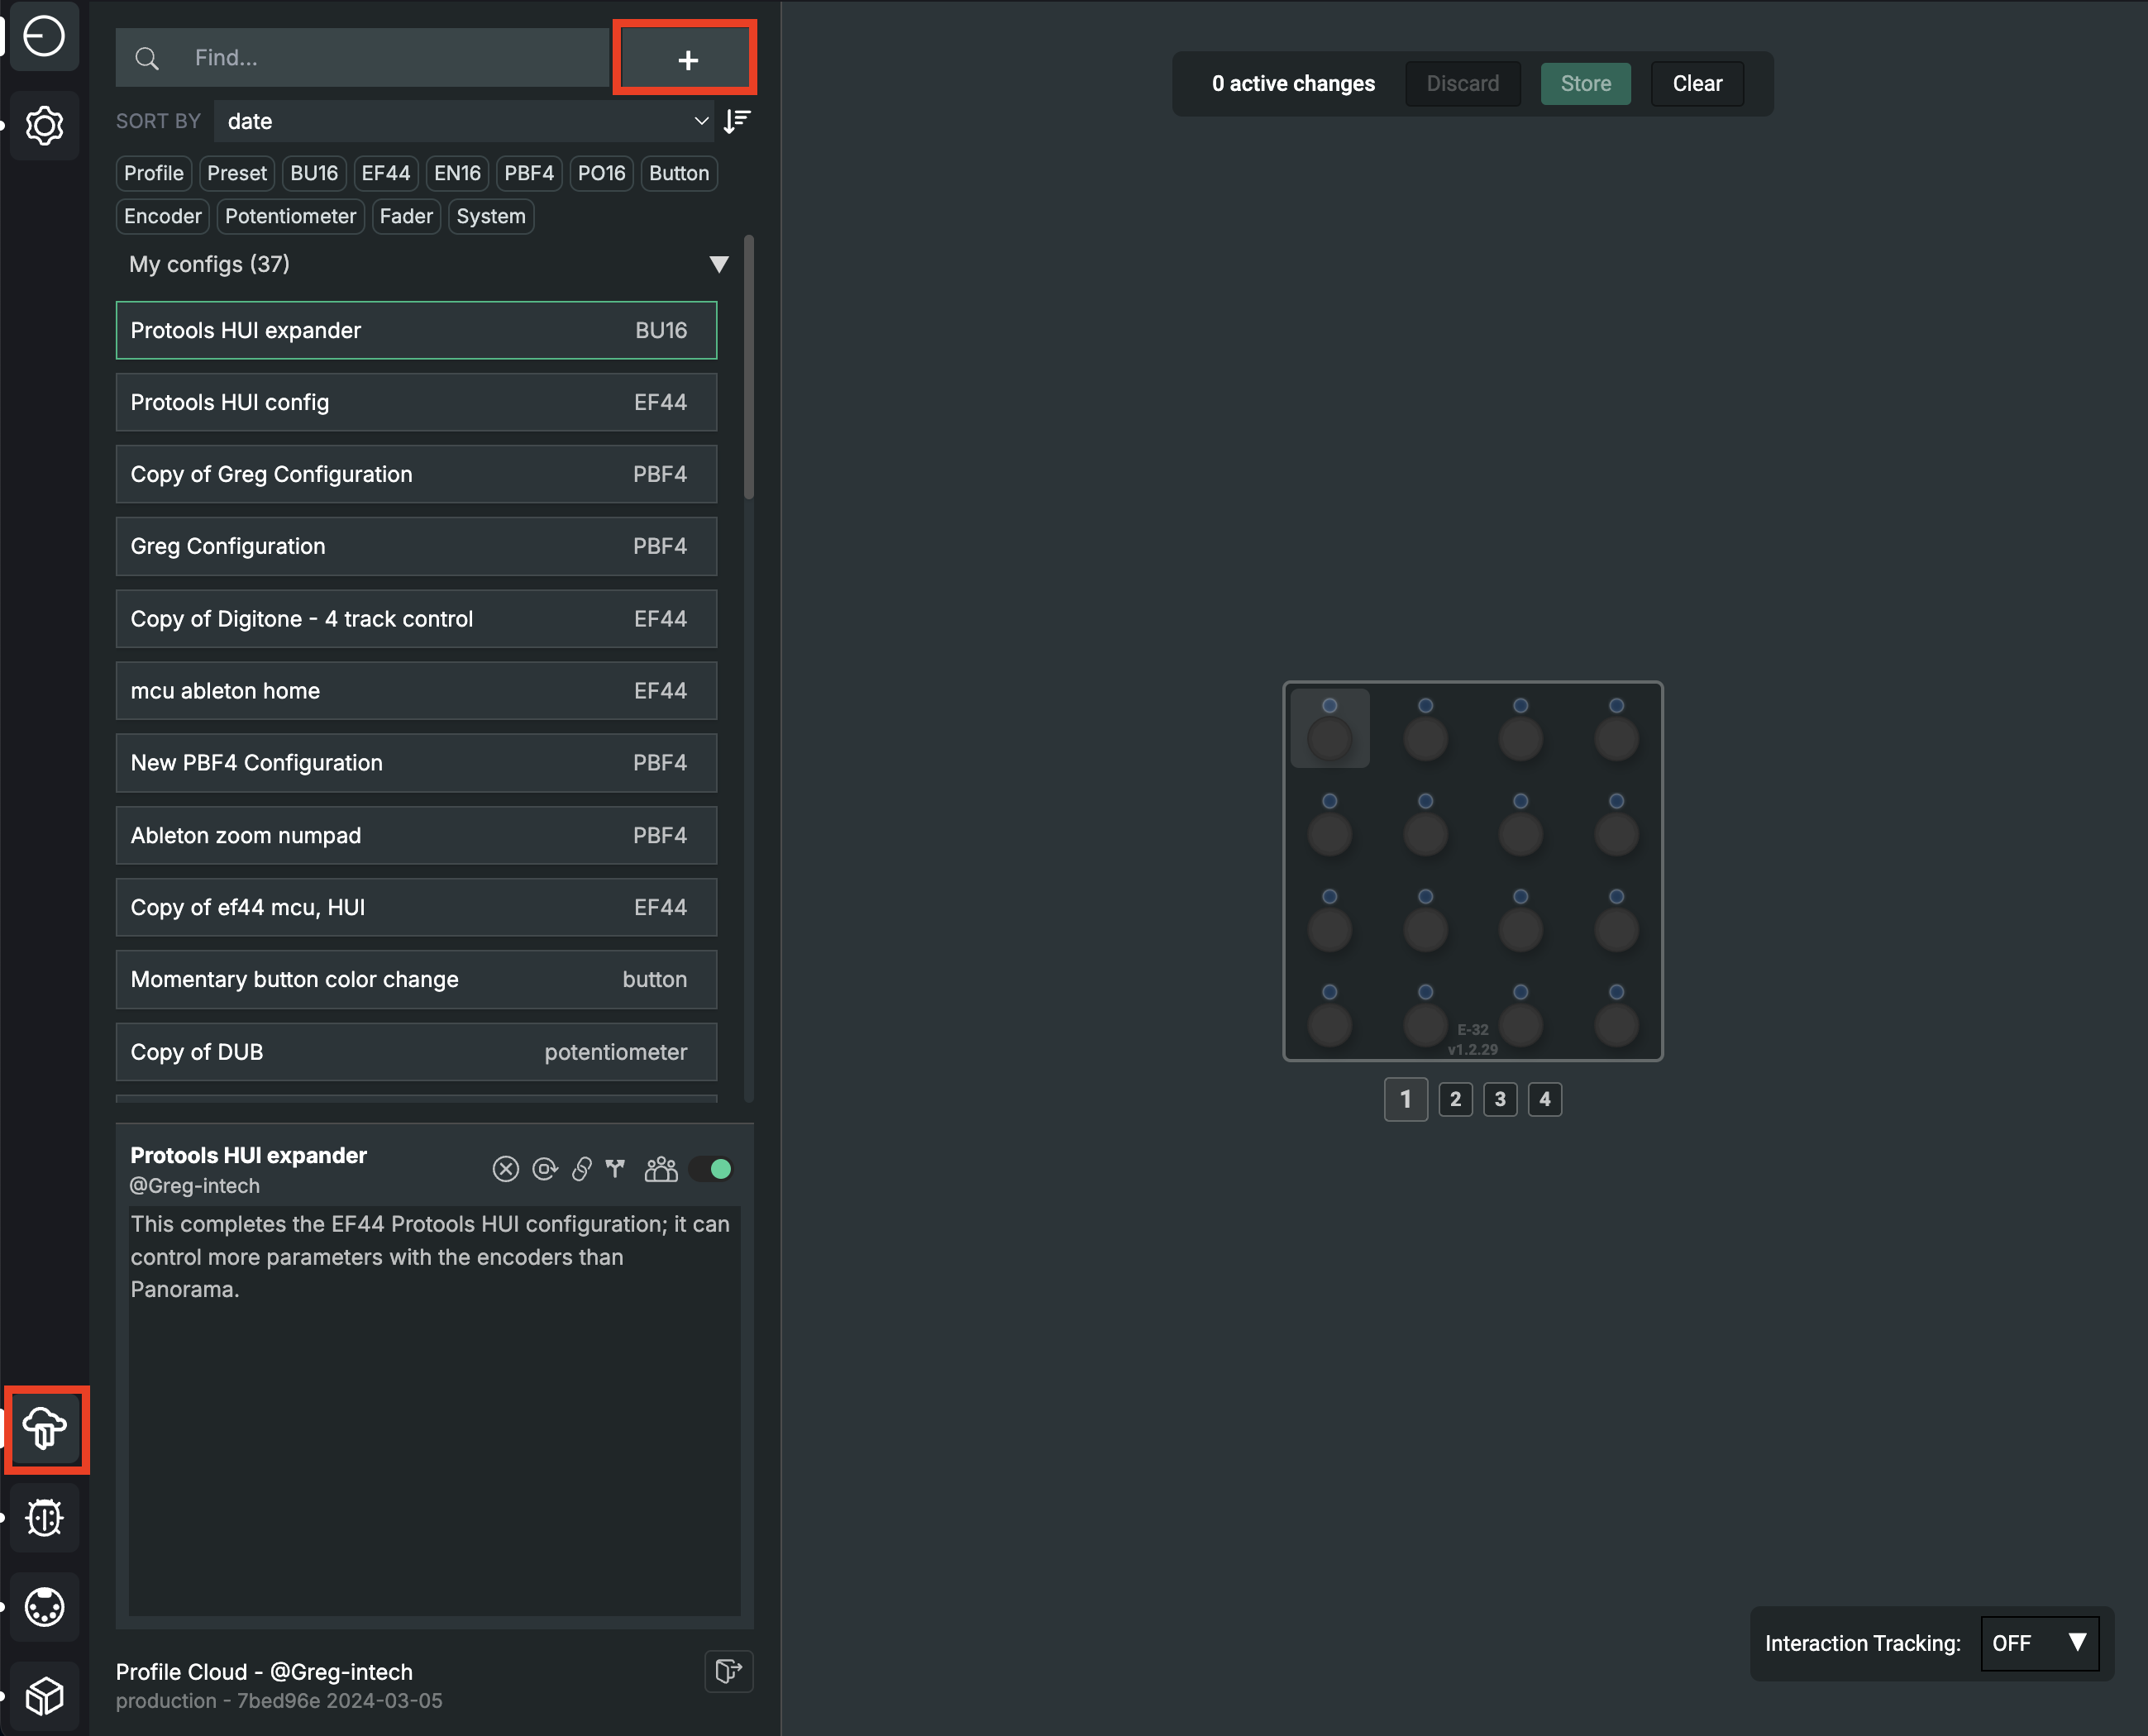
Create a Profile or Preset
Click on the Profile Cloud tab on the left sidebar. Here you can create a new Profile or Preset. Beside storing your changes to the module, it's highly encouraged to keep copies of your configurations in this Profile Cloud panel. You can name these Profiles and Presets and also make them public for others to use and learn from.
Learn more about Profile Cloud and it's features here.
Difference between a Profile and Preset
A Profile is a collection of all Actions configured for all Events on a single Page, on one module. A Preset is a collection of a single control element's Events its configured Actions.
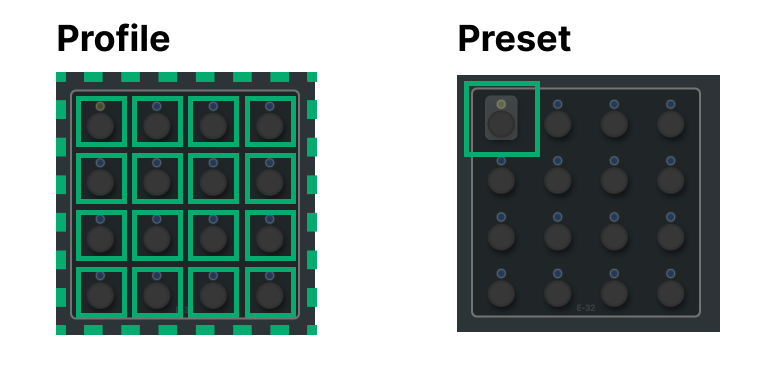
Preset: single control elements configuration
Next steps
After navigating around the app, in the next article we'll change the control element modes and get to know more tools.